
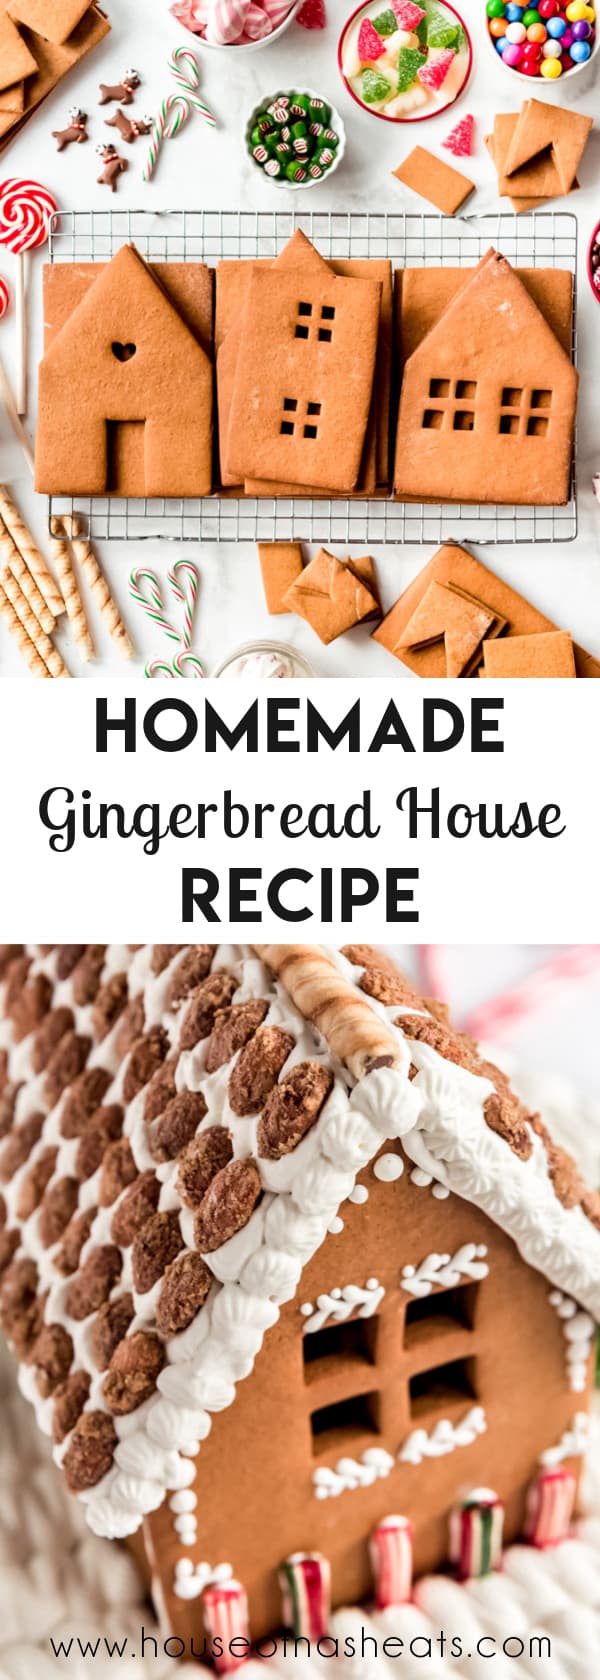
Sure you could just buy a kit from the store, but it's much more fun and fragrant to make one yourself using this Gingerbread House recipe with royal icing to hold your construction together. It's one of our favorite Christmas traditions!
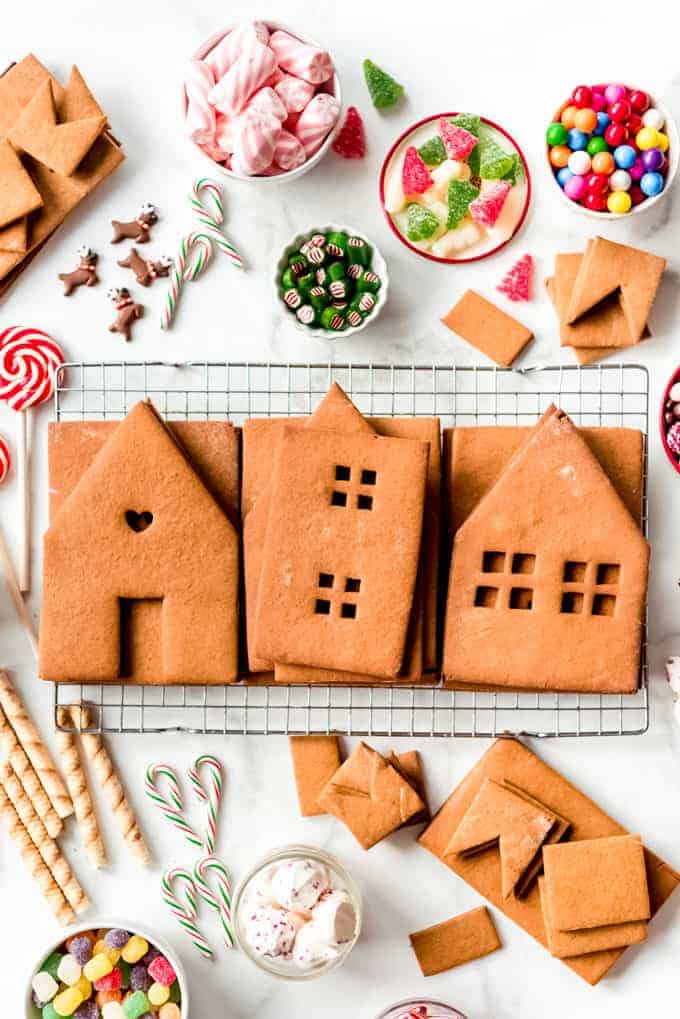
Table of Contents
- Gingerbread Decorating Ideas
- How to Make a Gingerbread House
- Making sugar cone trees for gingerbread houses
- Making windows in gingerbread houses
- Finishing the look of your gingerbread house
- Gingerbread House Decorating Tips
- How long will gingerbread houses last?
- More Christmas Recipes
- Gingerbread House Recipe Recipe
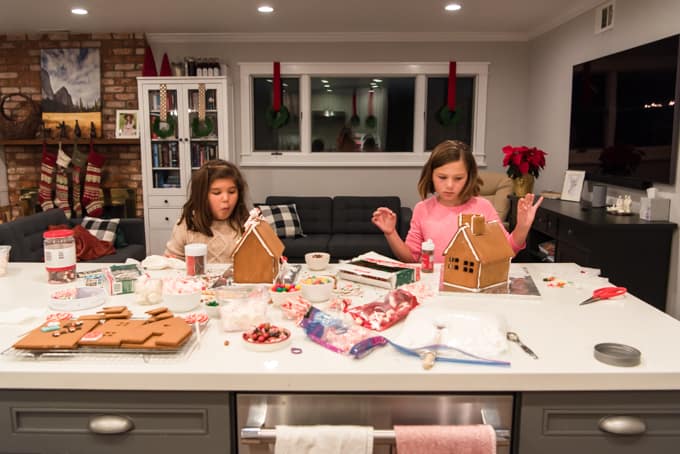
It's the most wonderful time of the year!
Almost 20 years ago I was spending one of my first Christmases away from my family while serving as a missionary for my church. A family from our congregation invited the missionaries over for a gingerbread house decorating party and it was so much fun! It was the first time I had ever decorated a real gingerbread house and I was put in charge of making the royal icing to act as the cement glue for the houses.
I have enjoyed making gingerbread houses almost every year since! When Paul and I were newly married, we would invite couple friends over to decorate gingerbread houses with us. When the girls were little, I opted for the easier approach of just buying gingerbread house kits from the store.
Nothing makes it feel quite like Christmas like the smell of gingerbread filling your house! We also love to make Soft Gingerbread Men Cookies and Gingerbread Cupcakes with Eggnog Buttercream!
But the kits are always so disappointing! The candy options usually aren't very good and there is never enough of it. The “glue” icing is always a pain to work with. And the gingerbread pieces themselves don’t even smell like gingerbread, which is one of the best parts of the whole thing!
Making gingerbread yourself at home means you can make whatever design you want, your house will smell like gingerbread for days and days (seriously, every time you walk into the room where you display your gingerbread house), and it’s way more fun to decorate with better (and more) candy than the basic ones that come in the box kit.
While this fun baking project is technically 100% edible, it doesn't exactly taste amazing. It needs to be able to hold up to humidity and sitting out for a few weeks, so it bakes really hard and strong. That said, my kids kept nibbling on spare pieces of the gingerbread whenever I wasn’t looking.
Gingerbread Decorating Ideas
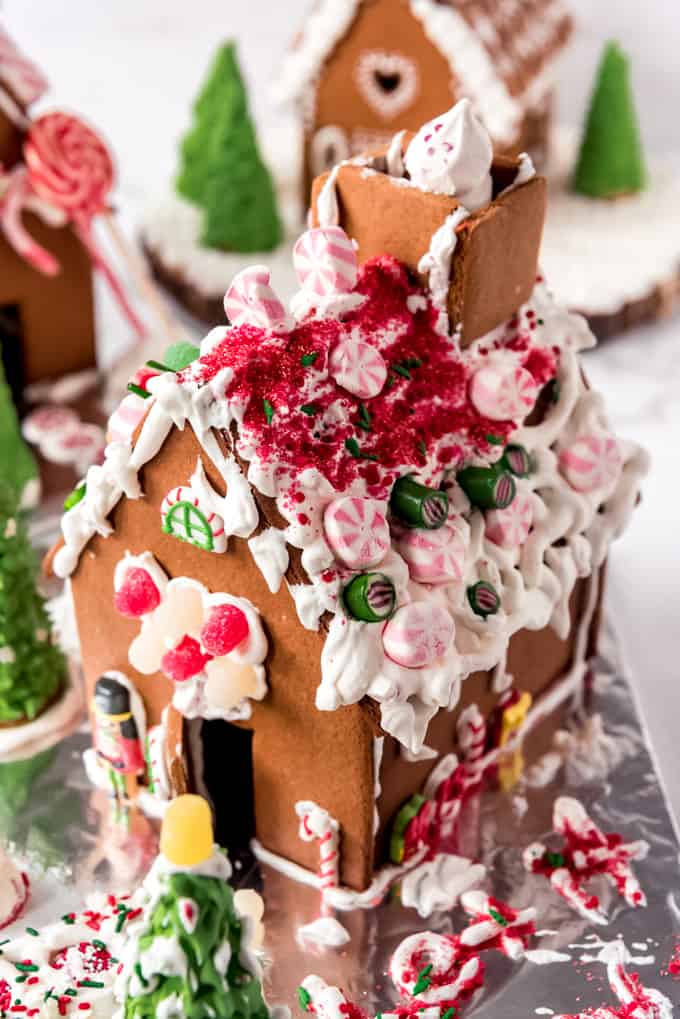
There are endless ways you can decorate your gingerbread houses! If you have decorating skills, you can pipe the royal icing in decorative patterns and swirls on the walls and roof of your house.
Or rely on candy to create a festive winter wonderland scene! Some of my favorite places for sourcing fun candy for decorating gingerbread houses are stores like Home Goods, Target, and craft stores. Sometimes, I will just save leftover candy that doesn't get used for the next year, since it's not something we plan to eat anyway.
Here are some of my favorite candies and decorating elements are:
- Gumdrops (so classic!)
- Pretzels
- Nonpareils
- Mini or full-sized candy canes
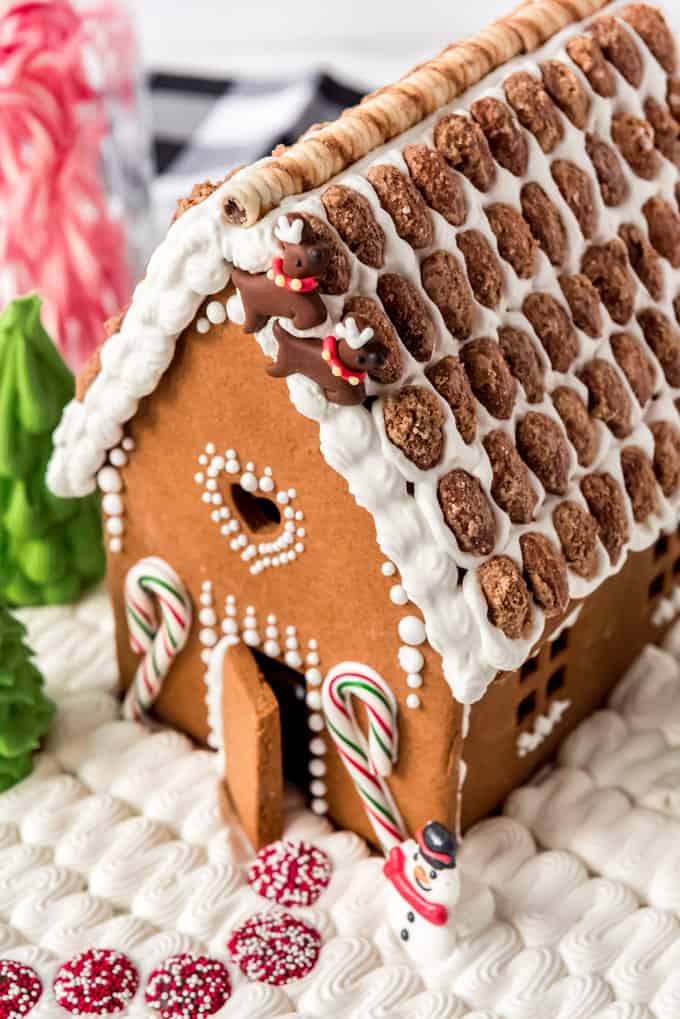
- Raw or candied almonds or other nuts
- Pirouette cookies (these make great log cabins)
- Shredded wheat cereal
- Necco wafers
- Gumballs
- Marshmallows
- Old-fashioned hard candies
- Holiday M&M's

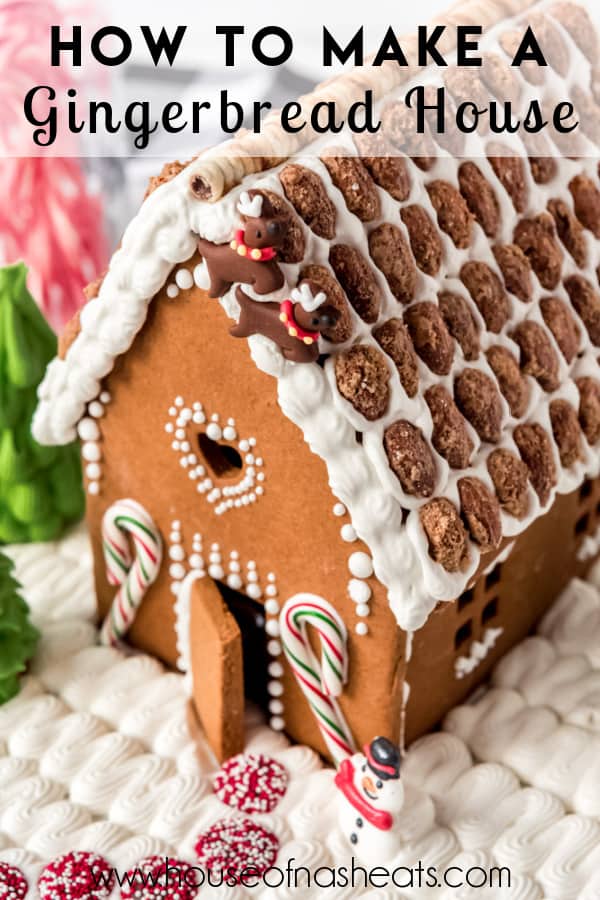
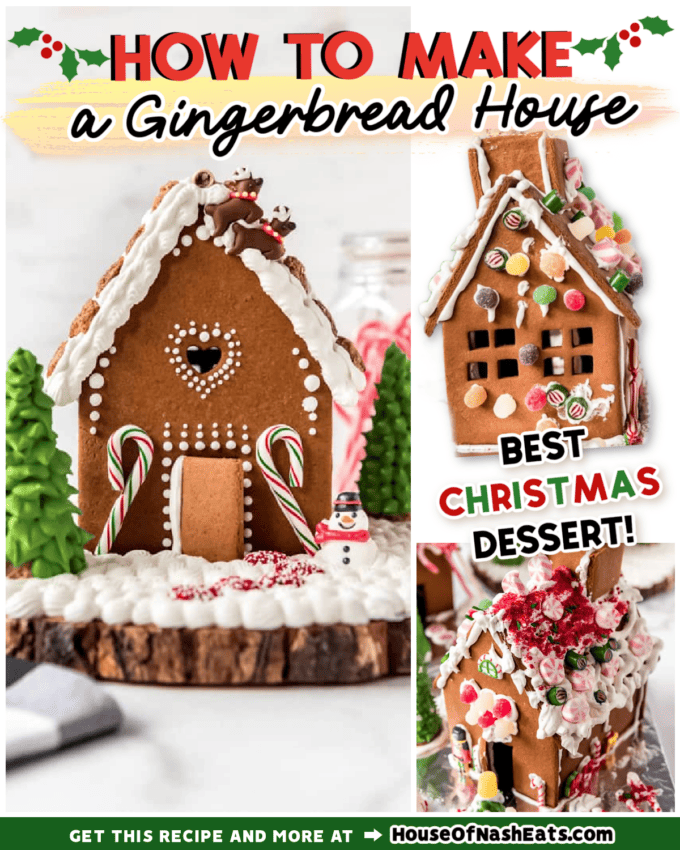
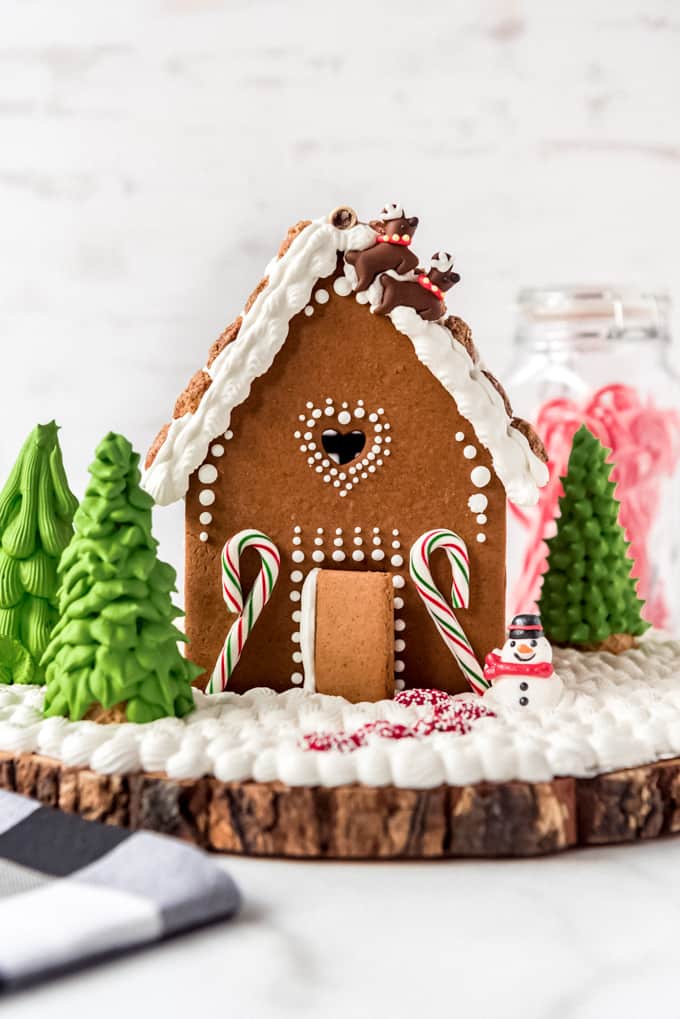
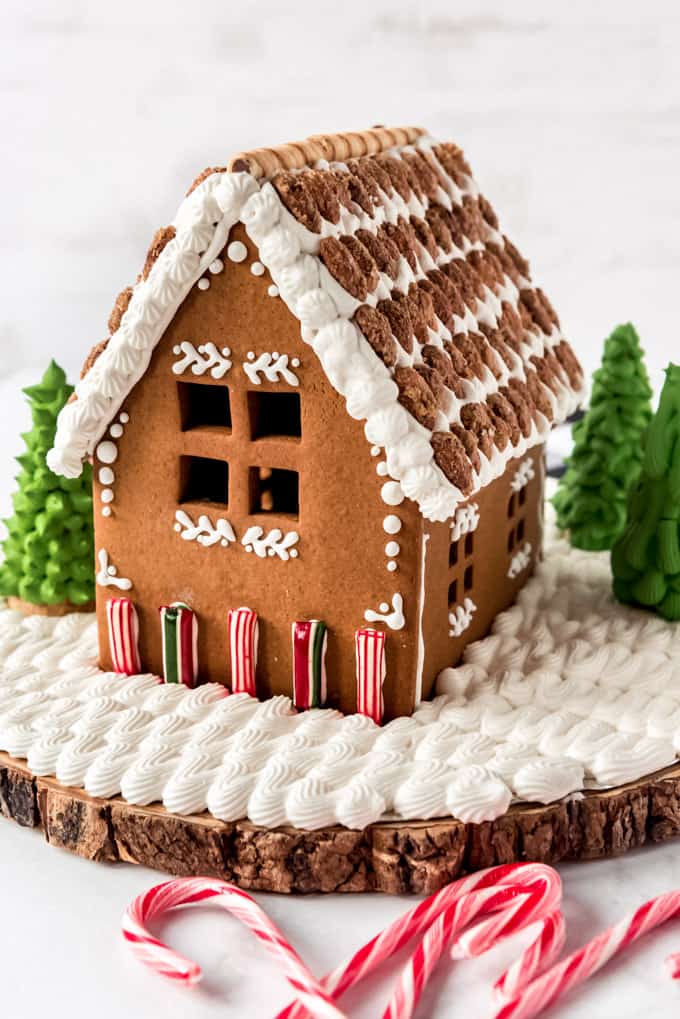
I ended up going a very different route than planned with my gingerbread house this year and did much simpler decorations using less candy and more royal icing piped in decorative dots BEFORE assembling the house while the pieces were lying flat. And I love it!
But I also adore the less-than-pinterest-perfect creations that my kids come up with. It's so fun to hear them come up with plans and then watch them execute them. Some of their ideas this year were arched bridges and ice skating rinks in the yard. And my oldest took the royal icing trees I made for her and used some of her white icing to "flock" them, which I thought was so creative!
And if you are like me and have a Type A personality and a hard time dealing with the mess, I find that it helps a TON to decide beforehand to just let the mess happen and not try to clean up and keep things looking nice as you go. Then once the houses are all done, move them to another location and clean up all the sprinkles and icing and mess in one go.
That may sound overly simple, but it has made a HUGE difference for me in terms of enjoying the process!
How to Make a Gingerbread House
I recommend making the gingerbread a day or two in advance so that you can relax and enjoy putting the gingerbread house together later. Attempting the gingerbread, icing, and construction all on the same day can be challenging.
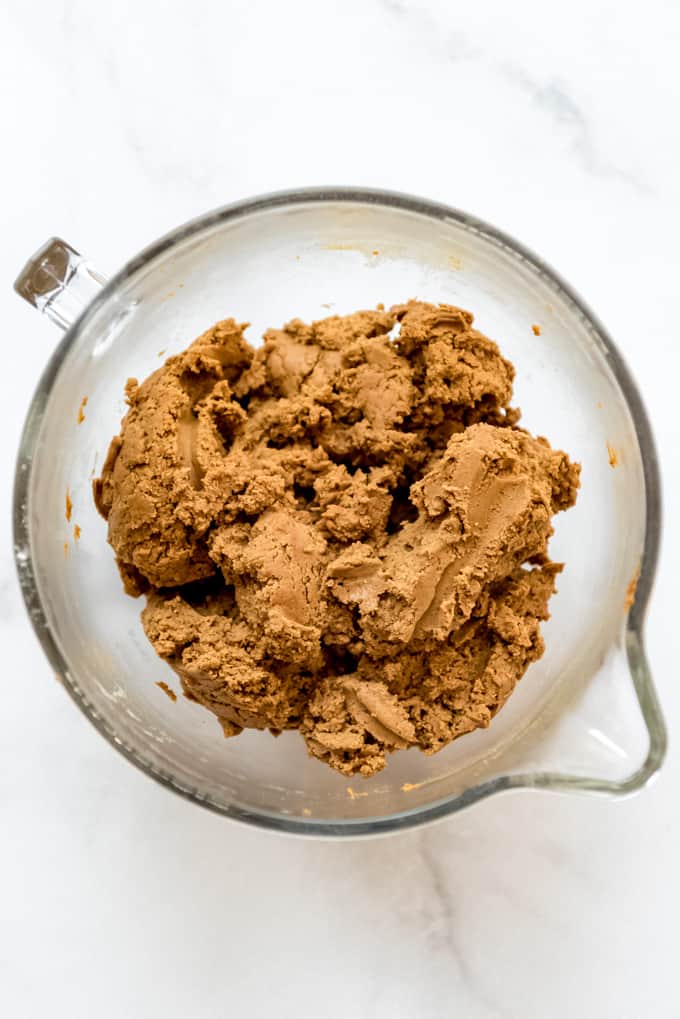
- Make your construction gingerbread dough: Combine butter and brown sugar in the large bowl of a stand mixer. Beat well using the paddle attachment until creamy and light. Add the molasses and mix again. Add the cinnamon, ginger, cloves, and salt along with 1 of the flour. Mix well, then continue adding the remaining flour, 1 cup at a time, and the water a couple tablespoons at a time, alternating between each addition. Be sure to stop and scrape the bottom and sides of the bowl partway through. The dough will be very thick. You can wrap and chill the dough at this point, but you really don’t need to.
- Roll out the dough: Roll out the gingerbread ¼-inch thick on parchment paper (even with flour, this dough will stick to your counter) by starting in the center and rolling it in one direction, then rotate the dough a quarter turn and roll in one direction again, repeating until the dough is rolled out. Be sure to flour the top of the dough periodically so it doesn’t start sticking to the rolling pin (affiliate link). I have a rolling pin (affiliate link) with height guides on the side that I LOVE for things like gingerbread and sugar cookies. But an inexpensive alternative is to pick up ¼-inch thick wooden dowels at the craft store and set them on either side of your dough as your guide to roll it out.
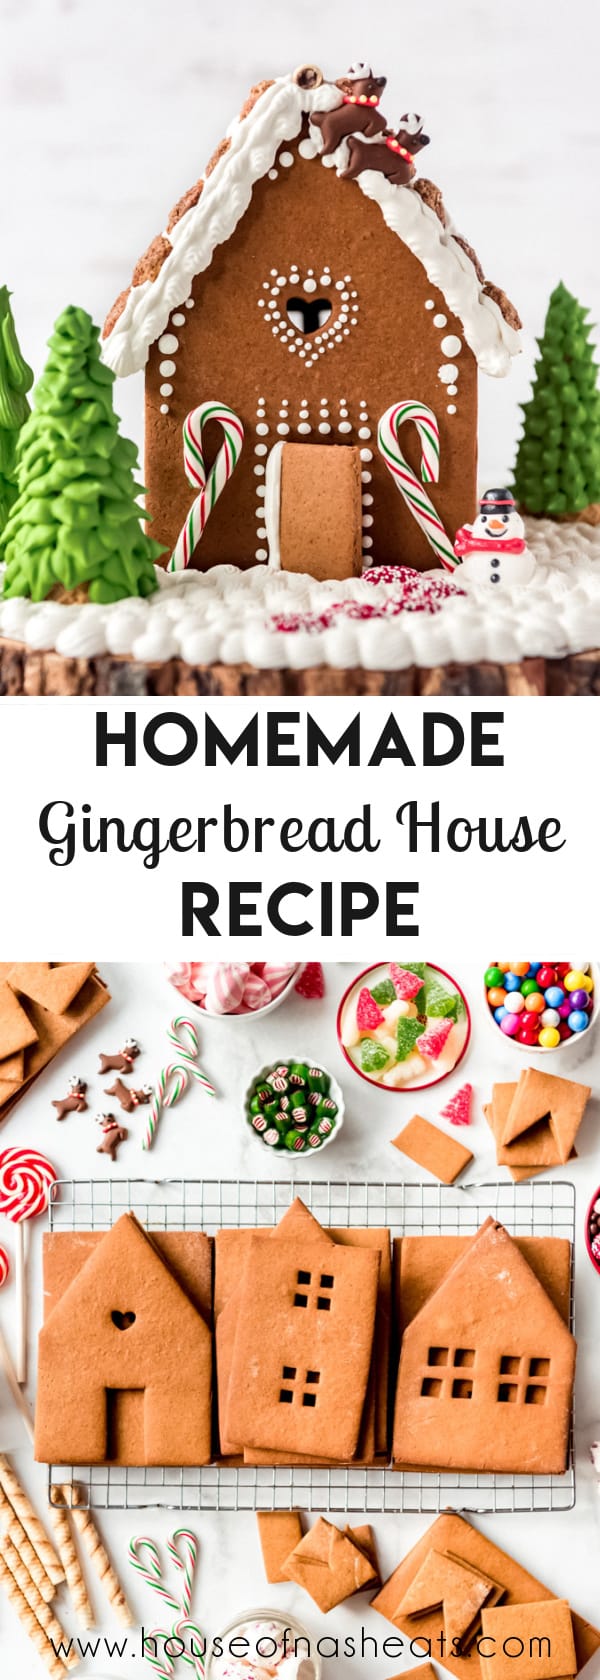
- Cut out your gingerbread house design: There are lots of great ideas online. I made a slightly different pattern for our Halloween gingerbread houses, but it work great for Christmas gingerbread houses as well. My pattern is about the same size as most of the houses that come in the kits I have tried in the past. You can make the houses larger or smaller by using the print option of most printers to increase or decrease the percentage size that the document will print as. Use a pizza cutter for cutting out most of the design and a small, sharp knife for more intricate pieces like windows and doors. Because we aren’t planning on eating the gingerbread, it’s not big deal to gather and re-roll scraps to cut out all the pieces.
- Transfer the pieces to two baking sheets: The best way to transfer the pieces is by lifting them with the parchment paper so they don’t stretch their shape too much. I bake the larger roof, front, and back pieces on a separate baking sheet from the smaller side and door pieces so I can pull them out at different times.
- Bake the gingerbread: The amount of time will depend on the size of your pieces and the thickness of your dough. That side, larger pieces like the roof and front and back of the house typically take 25-30 minutes to bake while smaller pieces like the sides and door are usually done in about 20 minutes. The pieces will continue to harden while they cool. If they still feel too soft once cooled, you can always turn the oven back on and bake them for another 10 minutes to cook them a bit longer and dry them out a bit.
- Make the royal icing “glue”: This type of icing will dry and harden after a few hours, acting as a cement to hold the gingerbread house together. You can leave it white, or use gel food coloring (affiliate link) to dye it red, green, or blue, which all look great on Christmas gingerbread houses. Transfer the icing into piping bags. You can use decorative piping tips if you want, or just snip off the ends of disposable bags. My favorite tip that I used to decorate the roof and ground on my house is the Ateco 32 (which is the same as the Wilton 32).
- Choose a sturdy base: I don’t recommend using cardboard for the base of your gingerbread house. It usually isn’t sturdy enough to support the weight of a decent-sized house. Instead, I recommend wrapping a piece of wood or a cutting board in foil and using that as your gingerbread house base. A baking sheet is another good option. The base in these photos is a fun circular board that I picked up at Target a few years ago and frequently use for fruit and cheese platters! I still covered it with a piece of foil to protect it from the royal icing though and make my clean-up easier.
- Assemble the walls: If you have a friend or family member, have them help you hold the pieces in place while you glue the front, sides, and back of the house together. Or just grab some cans of beans or vegetables and use them to prop the sides in place while the icing firms up. I usually wait 5-10 minutes for the walls to set a bit before placing the roof on, then I give my house 20 minutes before proceeding with the decorating, just to make sure it doesn’t fall apart in the middle of covering the roof or something.
- Decorate! This is the fun part where you can let your imagination run wild! Use your royal icing, piping tips, and lots of decorating candy to make a fun design that can be spooky or sweet!

Making sugar cone trees for gingerbread houses
I think the trees add so much to the overall look of the gingerbread houses! At Halloween I made spooky black licorice trees to go around our houses, but this time I used sugar cones and some of my royal icing that I tinted green to make sugar cone Christmas trees!
I used the Ateco 352 leaf tip and Ateco 32 star tip to create the different types of branches and leaves on these trees. I recommend starting a little above the base of the overturned sugar cone and working your way up to the top to cover it with icing. I was able to hold it on the inside with my fingers and just twist my wrist to work around the cone.
The thicker icing will take a while to dry all the way, so be careful handling these for a bit so you don't destroy your decorating work. I left our trees plain, but you could add sprinkles while the icing is still wet, if you want.
I only did one height for our trees, but you could stack multiple cones to vary the height of your trees. You might also want to ice them with white royal icing for a snowy tree. Or roll them in shredded coconut for a totally different effect!

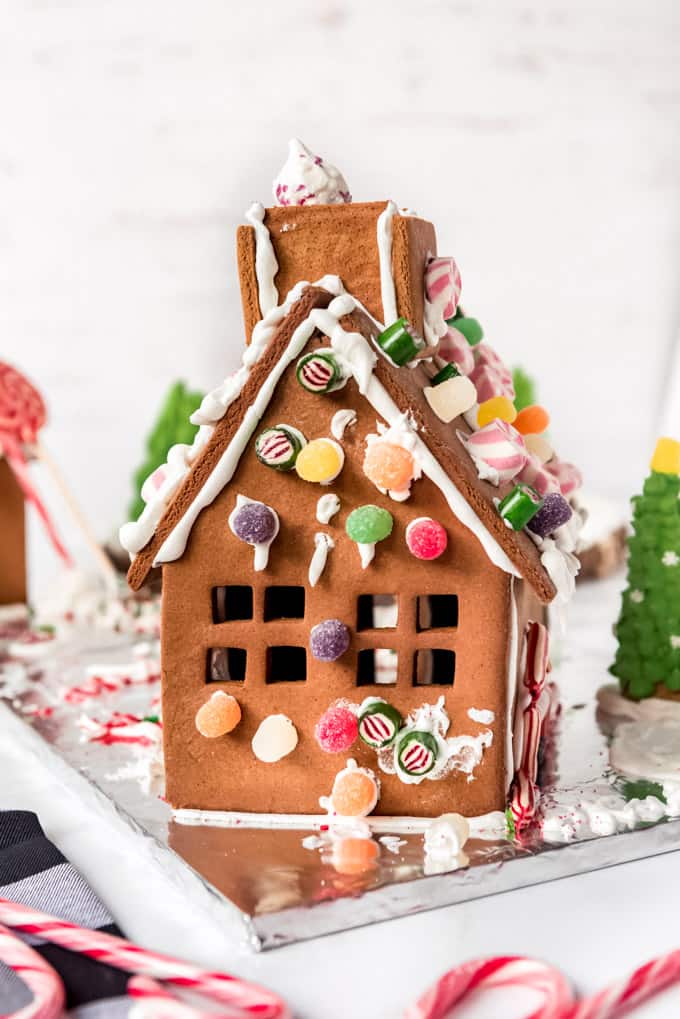
Making windows in gingerbread houses
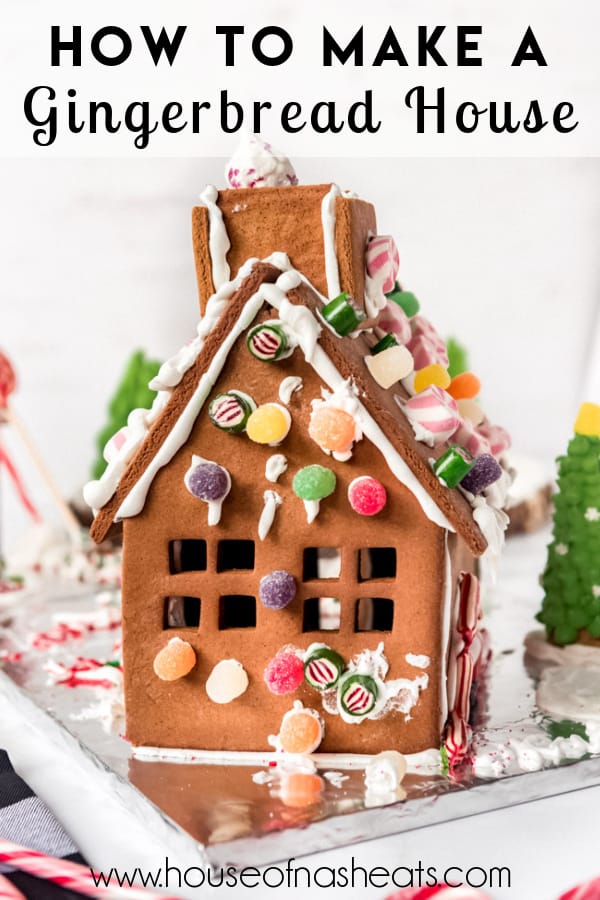
Little shaped fondant cutters (<--affiliate link) are perfect for punching out windows and other shapes in your gingerbread before baking. They come in all kinds of shapes and sizes like squares, hearts, and circles. But you can also free hand the windows using a small, sharp knife.
Finishing the look of your gingerbread house
I have found over the years that the one step that always makes the biggest difference in giving my gingerbread house a clean, professional look, is to cover the base with royal icing rather than leave the aluminum foil exposed. It hides crumbs, sprinkles, drips of frosting, etc. and makes the finished project look so nice! I just pipe zigzags with the Ateco 32 piping tip as my final step so I don't risk dropping any sprinkles or anything on the pristine "snow" before it has a chance to set all the way.
Gingerbread House Decorating Tips
- Repairs: If your pieces break, which can happen every now and then (especially if you drop them), you can always glue them back together with royal icing and cover up the flaws with candy!
- When all else fails, use the glue gun: If your house isn’t holding together, you could always break out the glue gun and just glue the thing together. I know it’s cheating and gingerbread house purists will be aghast that I would suggest such a thing, but it’s better than stressing over a gingerbread house that won’t come together.
- Consider decorating BEFORE assembling: Feel free to use your piping skills by decorating the walls with royal icing prior to assembling the house. Windows and other designs look so beautiful on gingerbread houses, but are crazy hard to pipe on vertical walls. If the designs are intricate, let them dry and harden overnight before assembling the house and finishing the design. If the designs aren't too detailed, you might be able to get away with decorating your pieces and assembling 20-30 minutes later, which is what I did here.
How long will gingerbread houses last?
We have kept our gingerbread houses as long as a month, but that's it. Towards the end, we had a roof piece or two fall off, which I just stuck back on with hot glue, but for the most part these should hold together through the holiday season. Then just dispose of it and make a new one next year!
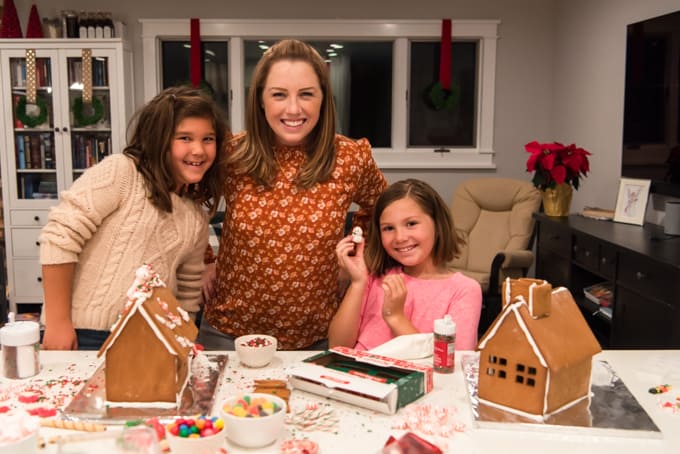
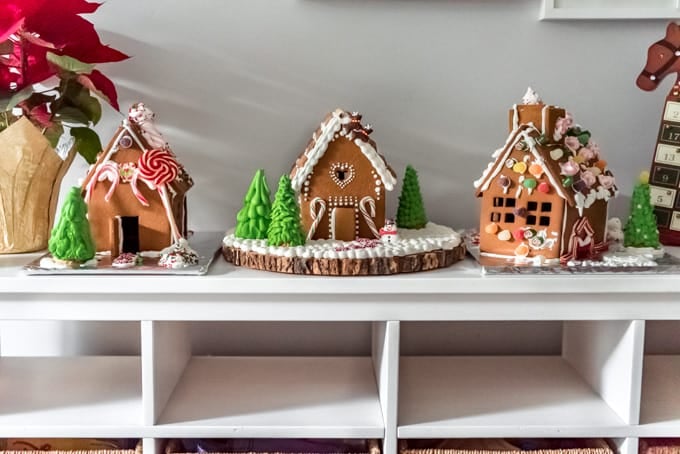
Here are the houses my girls and I made this year!
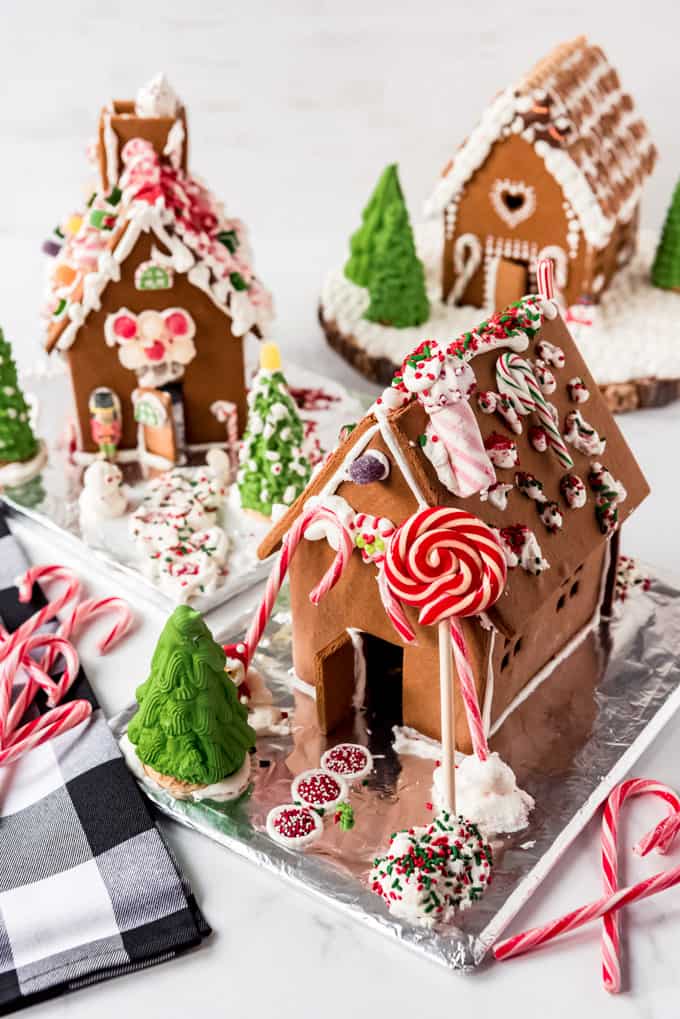
I would LOVE to see your gingerbread house creations! If you make one, please send me a pic or tag me on Instagram so I can see!
More Christmas Recipes
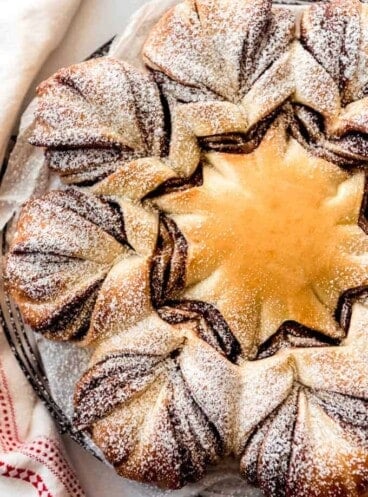
- Christmas Tree Crepes
- Peppermint Ice Cream
- Sugared Cranberries
- Peppermint Bark Cheesecake
- Churro Toffee (Disneyland Copycat Recipe)

Did you make this recipe?
Let me know what you thought with a comment and rating below. You can also take a picture and tag me on Instagram @houseofnasheats or share it on the Pinterest pin so I can see.

Gingerbread House Recipe
Ingredients
Gingerbread Dough
- ½ cup salted butter
- 1 cup brown sugar
- 1 cup molasses*
- 2 Tablespoons ground cinnamon
- 1 Tablespoon ground ginger
- ½ teaspoon ground cloves
- 1 teaspoon salt
- ½ cup water
- 6 cups all-purpose flour
Royal Icing
- 2 pounds powdered sugar about 8 cups
- 6 egg whites
- 1 teaspoon cream of tartar
Instructions
Gingerbread
- Print out my and cut out the shapes or design your own house. Set aside. Preheat oven to 350 °F.
- Cream butter and sugar in a large bowl of a stand mixer fitted with a paddle attachment. Add the molasses and mix well.
- Add the cinnamon, ginger, cloves, salt, and 1 cup of the flour, mixing until combined. Continue to add the remaining flour, 1 cup at time, alternating with the water until a thick dough comes together. Be sure to stop and scrape the bottom and sides of the bowl partway through. The dough should be stiff enough for rolling right away, although you can chill it in the fridge for up to 3 days, if desired.
- Roll out the dough on parchment paper to ¼-inch thickness. This dough tends to stick even to floured counter tops, so parchment paper is pretty much crucial to your success. Be sure to flour the top of the dough and your rolling pin (affiliate link) periodically so it doesn't stick.
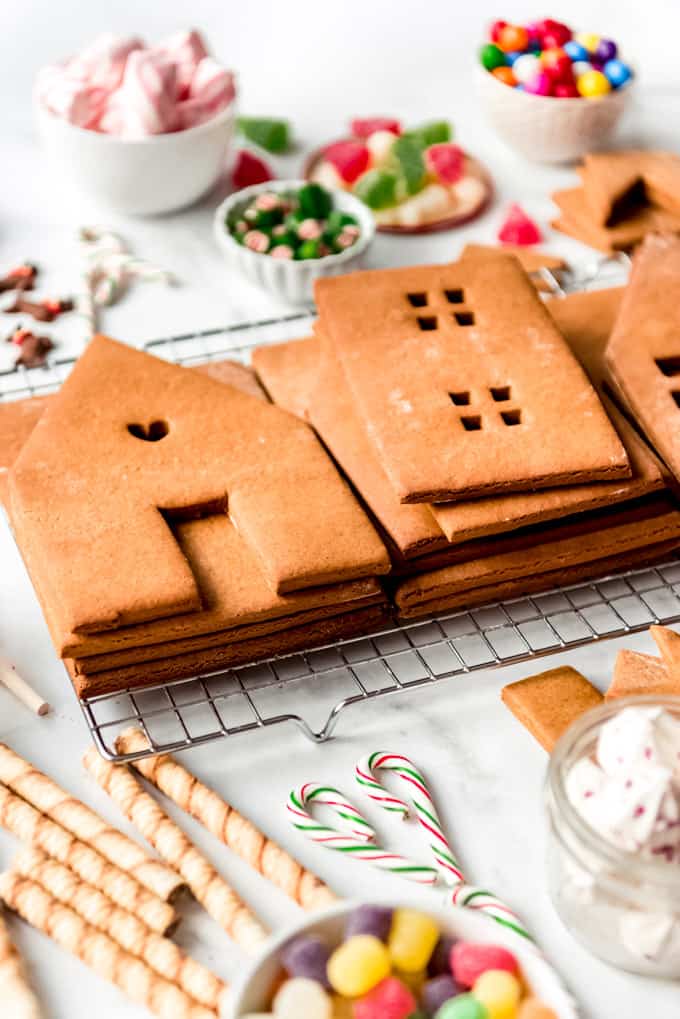
- Place the pattern shapes on the gingerbread dough and cut out individual pieces using a pizza cutter for longer lines and a small, sharp knife for smaller shapes like doors or windows. Re-roll the dough scraps as needed until you have cut out all the pieces for your houses. If your dough is ¼-inch thick, you should have just enough dough for 2 basic houses. Carefully transfer the pieces to baking sheets lined with parchment paper.
- Bake on parchment paper on two to three large baking sheets. Baking time depends on thickness of each piece, but generally the larger roof, front, and back pieces will take about 25 to 30 minutes. Smaller pieces like the side walls and doors will take around 20 minutes. The edges will be lightly browned when done and the pieces may still feel somewhat soft, but will continue to harden as they cool.
- Cool pieces completely before decorating. The gingerbread pieces can be made a week in advance and stored on the counter. Or you can freeze them for 2-3 months and thaw at room temperature before decorating.
Icing
- Combine the powdered sugar, egg whites, and cream of tartar in a large bowl. Beat well for 7-10 minutes until thick and forming stiff peaks. The icing should be pipeable. If needed, add additional powdered sugar to thicken the icing, or a little water, a couple teaspoons at a time, to thin.
Assembly
- Cover a sturdy board or surface with aluminum foil. "Glue" the front, sides, and back of the house together by piping thick lines of icing onto the pieces and holding them in place, propping them with canned goods if needed until the frosting sets, usually within just a few minutes. This is usually enough to continue decorating. The icing will continue to harden overnight.
- Add the roof after the walls have set up a bit and hold it in place for a couple of minutes until it seems solid. It's best to wait 10-20 minutes for the house to set up before proceeding with decorating.
- Once the house seems fairly sturdy, go ahead and decorate with remaining icing and candy.
- Display your finished house!
Notes
- *For lighter gingerbread, use ⅓ cup light corn syrup, ⅓ cup molasses, and ⅓ cup honey in place of the full 1 cup of molasses. For the lightest possible color, use all corn syrup instead of molasses and honey.
- Meringue Powder Alternative to egg whites: Rather than using egg whites, you can use the same amount of powdered sugar with ½ cup of meringue powder and ½ cup of water. Just combine them in a large bowl and beat until stiff peaks form, adding additional water to thin out the icing as needed to it's nice and pipeable.
- Makes 1-2 houses depending on pieces.


In your ingredient list for the icing you use 6 egg whites.
In your instructions for making the icing you say to combine the sugar and meringue powder.
How much meringue powder should I use if I replace that with egg whites?
Or should I use egg whites and meringue powder, if so again how much meringue powder do you recommend?
Thank you for pointing that out, Katie! I was pulling from my Halloween gingerbread house instructions where I used meringue powder and just missed editing that step! It's fixed now, but you can use either approach. If you want to use egg whites, no additional liquid is needed. If you want to use meringue powder, it's 1/2 cup of meringue powder to 8 cups of powdered sugar with 1/2 to 3/4 cup of water (start with the smaller amount and add more water as needed to reach the desired consistency). I hope that helps!
Is it 1/2 cup total for the gingerbread or 1/2!cup each time you add a cup of flour?
Considering making these as an activity for my kids and their cousins in a little less than a week. How far in advance could I make them? Think they’d be assemblable if I made them a few days ahead of time?
Absolutely! Just make sure they are baked all the way through (so, not soft or bendable) and store the pieces in an airtight container. We make these and they literally last all month long with no problems, so prepping the pieces ahead of time is a great idea.
Maybe I missed it, but how many little houses does this recipe make? I understand it would depend on the size of your house.
I can usually get 2-3 good sized houses out of a batch, so probably 4-5 little ones?
I'm looking at doing this with our family, love it! How far in advance can you make the icing and still be pipeable? Is a few hours ok? Wanting to set up the gingerbread stations before everyone gets there to tidy away the mess. Thank you 🙂
I used this recipe and it is amazing! When you bake it, there is absolutely NO spread, so the gingerbread pieces come out perfectly! My house turned out perfect!
I'm so glad it worked so well for you, April! Merry Christmas!
I’ve always wanted to make a gingerbread house from scratch and I couldn’t have done it without this post! Used the recipe and template and it all turned out wonderfully! Thank you! 🙂
It was hard enough to build with but it really tasted like cardboard 😣
I love this recipe. I had been searching for one that I could make using gluten free flour. This worked great. Only this I changed was the regular flour for gluten free flour.
Hi Amy,
The gingerbread came out great, just haven’t decorated yet. I was wondering if I can make the frosting the night before i plan to frost it with no issues ?
Hi! Is there anyway you could post the template for the gingerbread houses you made here? They are so cute!!
Hi! I posted a link to the gingerbread house template I used ( https://houseofnasheats.com/wp-content/uploads/2020/10/Gingerbread-House-Template.pdf ). I just modified it a little bit by making the walls a little straighter and cut out the windows and heart design. But the sizing for the walls and roof are all from the template. You can even make the design larger or smaller by adjusting the Zoom settings on your printer. My Haunted Halloween Gingerbread House also shows how I cut out the dough for the house ( https://houseofnasheats.com/halloween-gingerbread-house/ ). I used the same template for the haunted house as well. Does that help? Let me know if you make one! I would love to see it! They really are so much fun to make.
Sorry, but where in the instructions do you add the water? Is doesn’t say… also it never says to add the salt either.
It's in step 3 - you add the water alternately with the flour.
Amy, how far in advance can I make the "glue" frosting?
Thanks!
You can make it days in advance and just keep it sealed in an airtight container with plastic wrap directly on top of it. As long as it doesn't dry out you will be just fine to use it when you are ready!
Amy, how far in advance can I make the "glue" frosting?
Thanks!
You can make it days in advance and just keep it sealed in an airtight container with plastic wrap directly on top of it. As long as it doesn't dry out you will be just fine to use it when you are ready!
Made the gingerbread and frosting today and both came out great!! Was easy to make and nothing broke! I will definitely be doing this from now on instead of buying the gingerbread house kits!!
This is such a great idea Amy! We did a Costco gingerbread house during the pandemic, and I bought an Oreo house for this year. But baking your own sounds like so much more fun. Can’t wait to try this next year.
I saw the Oreo houses the other day! We've done both approaches but I definitely prefer the homemade ones. 🙂
This worked great! I either don’t know how to get 1/4” thickness or I made my house pieces bigger than normal cause I needed a second batch but that just meant I also got to make a smaller one for my daughter to have her own. And that’s a win for me!
Is the butter room temperature or right out of the fridge? Thanks
Softened butter
Not to my taste at all. Maybe the molasses or too much clove? But it did hold up a lovely little house and the royal icing was great!
To simplify but still have fun, we only do a flat house. Just make the front wall, lay down on parchment and decorate. I've even started buying the thin aluminum pans from Dollar Tree to lay the houses down in to decorate. My grand daughter is 11 now but the adults are who enjoys it most! I make a whole table with ginger bread stuff. When done, they cover with foil and take home. Got the idea from a friend who has 15 grandchildren under the age of 10! To build a whole house....whoa! So she simplified to flat houses!
ThI dough is way too crumbly to actually roll it out.
I used melted butter and only 5 cups of flour. Dough had good texture and baked into sturdy delicious pieces.
Where do I find the pattern for the gingerbread house, not the Halloween house?
I haven't posted the basic one, but I will try to get one made!
This recipe too crumbling, and the taste not really my favorite. Do not think my kids will even eat it. But taste differ.
This recipe is not for eating, even if it is technically edible. It's construction gingerbread for building and strength, rather than for taste.
Added a little water, used a LOT of cooking spray, and these worked out great!! I bought cookie cutters from target and was able to get three houses from one batch. Huge time saver for me!!!