


Water Drop Photography for Beginners: Fun Ideas & Tips
Everything you need to know about water drop photography using as phone or camera, from equipment and setup to execution and post-processing.
Learn | By Ana Mireles
Shotkit may earn a commission on affiliate links. Learn more.
Water drop photography is a fun project that gives stunning results.
It’s not as easy as you might think, though. You need some preparation and a space where you can get messy.
I’ll tell you everything you’ll need in this article – from the basic setup to the editing process.
Capture mesmerising photos from the comfort of your home. (The easiest way to learn water drop photography.)
Plus, I’ll give you some creative photoshoot ideas to get you going.
Are you excited? Let’s jump right in!
What is Water Drop Photography?

Credit: Erda Estremera
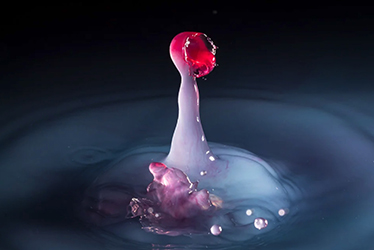
Water drop photography (AKA water droplet photography) is a type of high-speed photography. It refers to capturing a water droplet bouncing off the water’s surface.
You can do water drop photography using different liquids – milk, for example. You can also use a few drops to create different types of splashes.
- Read more: How do you do milk bath photography?
However, if the splash is not created by a drop of water but by a solid object, it’s no longer called water drop photography.
For example, if you drop ice cubes into a drink, it’s either splash photography or drinks photography.
There’s a related genre called water drop refraction photography.
This is where you photograph water drops suspended on different surfaces. For example, it could be a leaf or a piece of glass.
Then, you put an interesting background like a flower or a smiley face, which gets reflected in the droplet. You can capture a good reflection using a macro lens.
Hopefully, the definition of water drop photography is clear now. It refers to photographing water drops falling into a water container.
Using a fast shutter speed, you freeze motion when the drop touches the water.
With this technique, you can create stunning photographs.
What Do You Need to Create a Water Drop Photograph?
You don’t need expensive or sophisticated equipment to do water droplet photography.
However, it’s not something you can improvise, either.
Here’s a list of equipment you’ll need to take a picture of a water drop.
The Equipment
Credit: Robert Anderson
Course (optional but recommended) – There’s a popular video course by Expert Photography called ‘WOW Factor Photography‘ – in it, there’s a great explanation on how to capture incredible water drop photos in your home with cheap equipment.
There are also tons of other fun photography projects that you can do at home – check the course out here.
How Much Do You REALLY Know About Photography?! 🤔
Test your photography knowledge with this quick quiz!
See how much you really know about photography...

Camera – You need a camera with interchangeable lenses. You’ll also need to connect it with external flashes. So, it can be a mirrorless or a DSLR.
Lens – Many people wonder, what is the best lens for water drop photography? The short answer is a macro lens.
Tripod – Since you’re using a fast shutter speed and flashes, there’s no risk of camera shake.
However, the subject is small, and the splash from the collision is unpredictable.
So, a tripod is mainly helpful in maintaining the same focus and composition from one shot to the next.
External flash – It doesn’t matter if you use big monolights or small flash guns – either way, you need to use a flash to freeze the water drops.
A water dropper – You need something to control the dropping. It may be a medicine dropper or a professional water dropper kit such as Splash Art 2 or MIOPS Splash.
The most challenging part about water droplet photography is the timing.
A water dropper kit is a device that coordinates the water drop with a remote shutter release.
This way, your camera fires when the collision happens.
Some also let you control the water drop size, whether you want one or two drops, and the interval. All of these contribute to getting different effects.
The Setup
Credit: Omar William David Williams
For the most consistent results, it’s better to work in a dark environment. Consider working indoors, where you can turn off all light sources aside from your flash.
Now, set down a container and fill it with water, milk, or any other liquid.
Place white cardboard behind the container to use as a background.
Place the water dropper on top of the container. Fill it with water or the liquid you’re using.
Now that you’ve built your set mount your camera on a tripod and place it in front.
To finalize the basic setup, add a flash pointed at the background. Then, put a flash with a softbox on the side to light the water droplet.
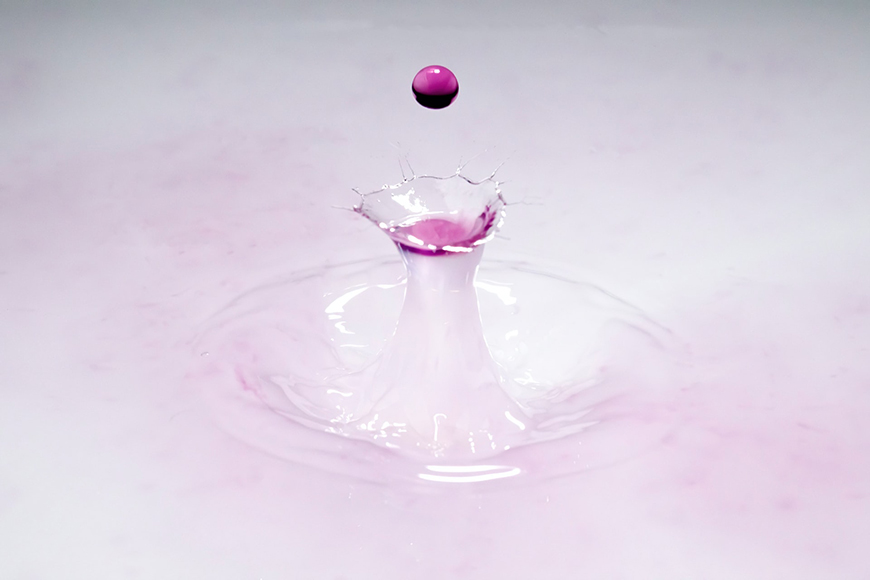
How to harmonize the light, color and background
There are three elements to which you can add color. You can color the liquid, the background, or the light.
- If you want to use light, you can add colored gels to your flashes.
- If you prefer to color the water, you can use food dye and experiment with different liquids.
- Finally, you can use a colored background. You can also put colored gels on the flash that’s pointed at a white background.
If you choose to use colors on all three, don’t use random colors. If you do, your pictures might end up looking too busy.
I recommend establishing a color palette if you want to experiment with different colors. Using tools like Adobe Color or iWantHue can be very helpful to harmonize the lights, liquids and background.
What are the Best Camera Settings for Water Drop Photography?
Credit: Skyler Ewing
Using the correct camera settings is essential in water drop photography. That’s why you need to set your camera to manual mode.
The correct exposure will depend on the power of your flashes.
You need to use the fastest shutter speed that synchs with the flash. Usually, this is 1/250 sec. This isn’t enough to freeze the water droplet – it’s the flash to freeze it. However, a fast shutter speed avoids capturing the motion before and after the flash.
You need to have a wide depth of field in water drop photography, so try to stick to the sweet spot of your lens. That should be around f/8 or f/11.
Maybe you’ll need to reach f/16 if your lens delivers a sharp enough image at this aperture. This is because macro lenses generally create a narrow depth of field, so you’ll need to compensate for that.
If you have enough light, keep the ISO at 100. Otherwise, raise it until you reach the correct exposure.
Remember that a high ISO introduces noise, so try not to exceed 400 or 800. This depends on your camera and how well it handles high ISO.
Another important setting is the manual focus. You can put a pencil or other object where the drops fall. Then, adjust the focus. You can do this manually, but if you use auto-focus, remember to pass it to manual before you shoot, so it doesn’t move.
Finally, set the flash to rear curtain sync for more consistent results. If you don’t have this feature, that’s OK. This mode helps, but it’s not mandatory for water drop photography.
Step-by-Step Guide to Creating a Water Drop Photo
Step 1: Prepare the liquid
You can skip this step if you’re using plain water or milk. However, if you want to make it colored or denser, then you need to prepare it.
To color it, you can use regular food dye. Alternatively, you can use glycerin, guar or xanthan gum to thicken it.
Step 2: Build your setup
Fill a tray with water. On top of it, you need to set something to create the dropping. If you have a professional kit, that’s great.
Otherwise, you can mount a filled plastic bag on a boom arm. Then, use a pin to make a hole and create a water drop.
Don’t forget to put a backdrop. A simple piece of white cardboard will do. However, feel free to experiment with colors and textures.
Step 3: Get the focus
You can put a pencil or a screw where the water drops will fall. Adjust the focus to that point and lock it. Then, remove the object you used to adjust the focus.
Step 4: Check the lighting
The most basic setup for water drop photography includes a flash with a softbox on the side. Then, a flash pointed at the background.
Feel free to experiment with the lighting to have more control over the reflections. Also, you can leave a dark background for a more dramatic effect if you prefer.
Step 5: Adjust the exposure
Start by setting the camera shutter to 1/250. Then, set the aperture to f/11 and the ISO to 100.
Take a test shot and see how it looks. If it’s not perfect, you can modify the lighting or change the settings to improve the exposure.
Step 6: Experiment
Now all you need to do is experiment until you find the best result. It may take some trial and error, but that’s part of the creative process.
Remember that you can change the size and shape of the splashes by adjusting the dropping height. You can also make the interval longer or shorter.
Use different liquids, try food coloring, re-arrange the frame, etc. Just have fun!
Fine-tuning Water Drop Photographs in Post-Processing

Credit: Vlad Chetan
You’ll probably take hundreds of images during a water drop photography session. So, culling is an integral part of the process.
Start by adjusting the white balance and exposure. Then, add contrast if you want a dramatic effect on your images.
Next, you can increase the vibrance and add some clarity. This will make the splashes more defined and the color pop.
Use the noise reduction tool if necessary. This is highly related to the ISO you used.
All these adjustments may be the same for all your photos (or at least for all the images you took with each setup). So, you can do batch processing to save some time.
The following steps of post-processing will be different for each photo. However, they’re important if you want to take your shots from good to excellent.
Remove any light reflections and distracting elements. Also, clean up any blemishes caused by drops that may have fallen on the lens.
You may experiment with filters or split toning to achieve a specific look.
Finally, crop the photo to achieve the best composition if you think it’s necessary.
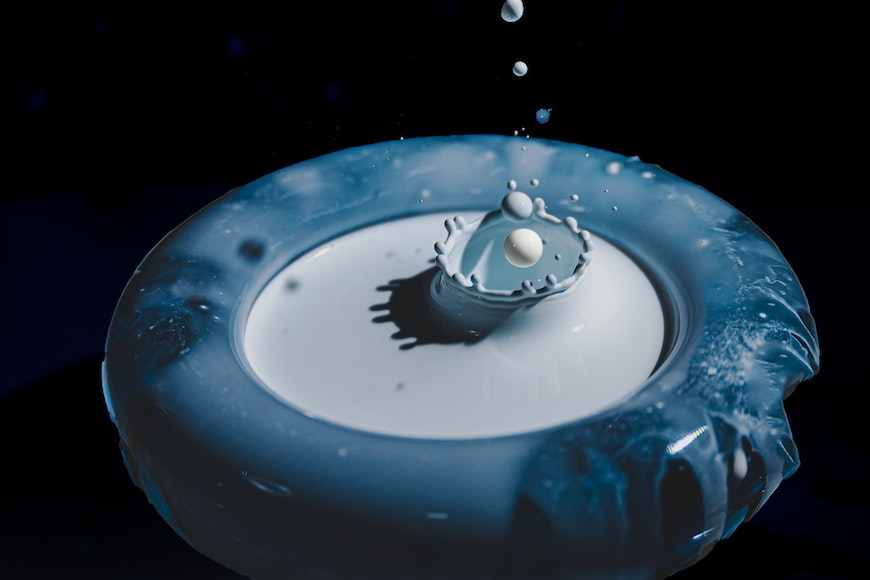
Water Drop Photography Ideas
Photograph a water drop inside a bubble.
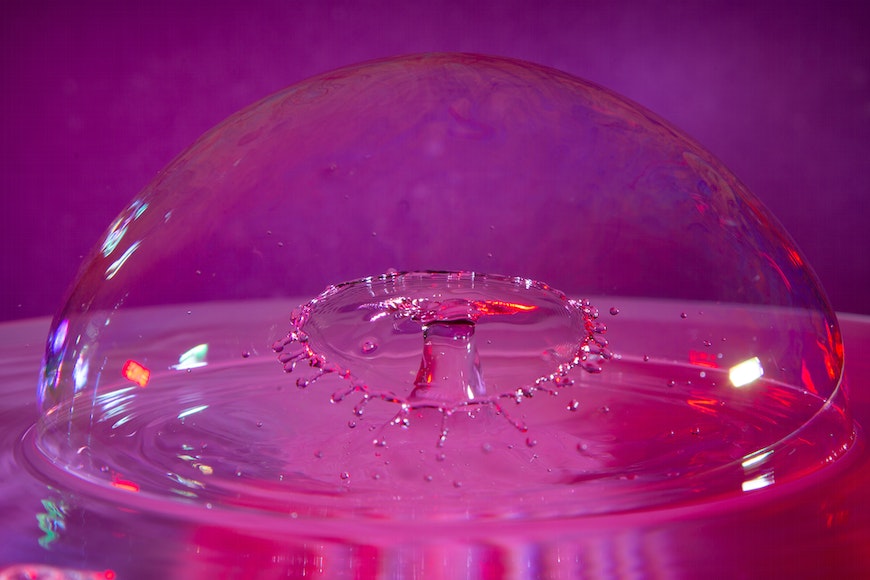
Credit: Benny Staehr
Did you know that water drops can pass through a bubble without bursting it? Well, it’s true!
So, using liquid soap, create a bubble on the water’s surface. Then, allow the drops to fall and make a splash inside the bubble. You can capture some stunning pictures with this technique.
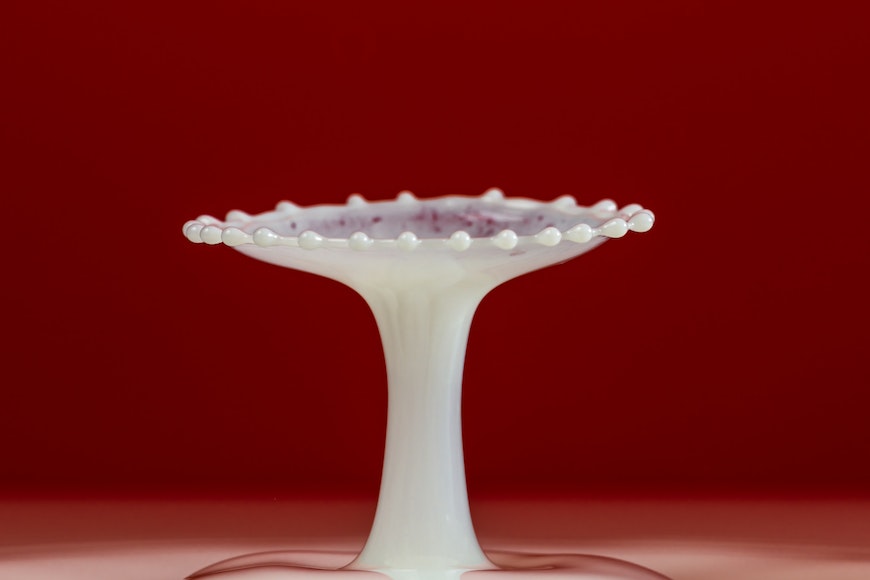
Add visual interest with reflections
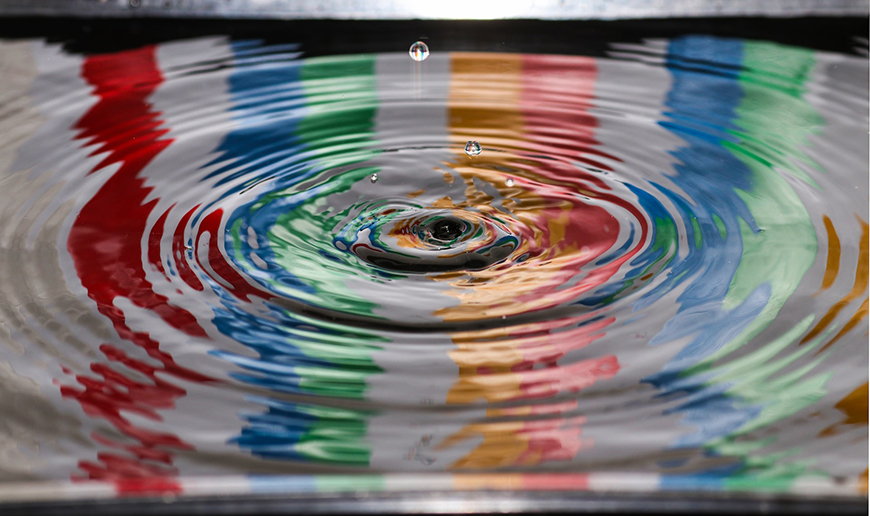
Credit: Jordan McDonald
Use patterns or colors in the background to make your images more fun. They will reflect on the water’s surface, adding visual interest.
You may also use patterns or shapes on the bottom of the water container. The ripples created by the drops will make them even more interesting to look at.
- Read more: How do you reflect an image in water?
Use post-processing to shape the water droplets
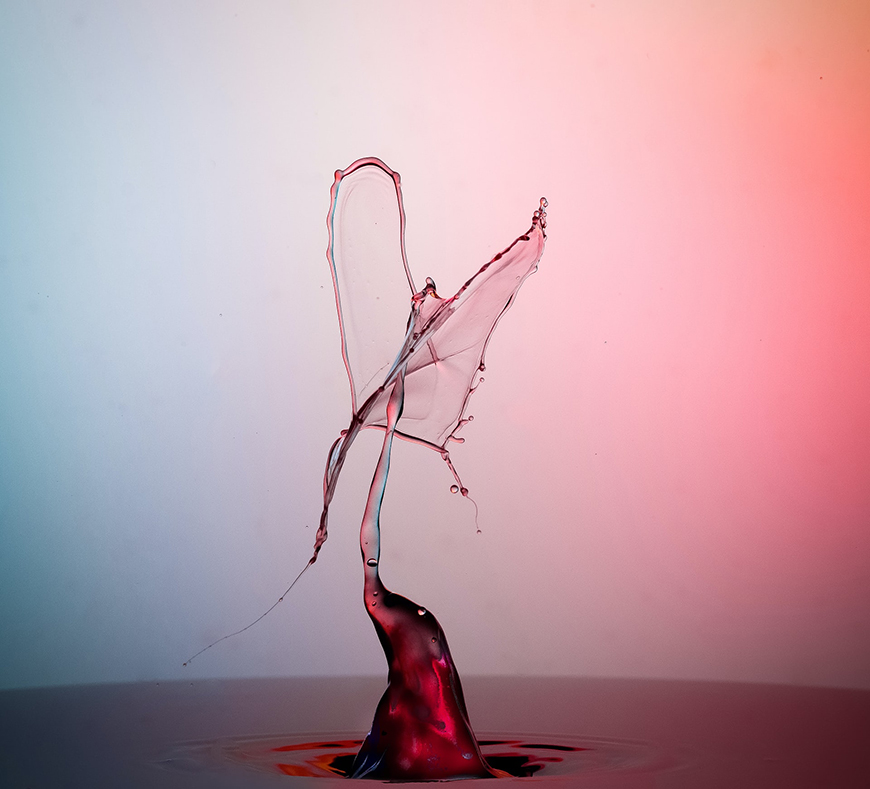
Credit: Luca
You can create different forms in Photoshop by modifying your image or doing a photo composite.
FAQ
How do you take a picture of a water drop reflection?
Water drop reflection in photography is another way to refer to water drop refraction photography. So you’ll need to take a macro shot of the water drop with an exciting background.
How do you photograph the refraction of water drops?
You need to use a lens with macro capabilities and place the focus inside the water drop. A tripod is also helpful to avoid camera shake and keep the frame and focus stable.
Water drop kits allow you to control the interval of the drops. Otherwise, it’s more challenging to achieve a constant rate.
How do you thicken water for water drops in photography?
There are many ways to give liquids a higher viscosity. You can use glycerin, sugar, or xanthan gum. However, guar gum is the most popular.
What’s the best mixture for water drop photography?
If using guar gum, add 1/8 of a spoon to two cups of warm water. Stir it well and pass it through a coffee filter to eliminate the lumps.
How do you make a water drop for photography?
You can puncture a plastic bag, use a medicine dropper, or buy a water dropper kit for more control.
Can I use my phone for water drop photography?
You need a camera syncing with a flash head to make water drop photography. However, you can do water drop refraction photography with a phone.
Capture mesmerising photos from the comfort of your home. (The easiest way to learn water drop photography.)

Check out these 8 essential tools to help you succeed as a professional photographer.
Includes limited-time discounts.


Ana Mireles is a Mexican researcher that specializes in photography and communications for the arts and culture sector.
👋 WELCOME TO SHOTKIT!

🔥 Popular NOW:
