The Tongariro Crossing is one of the best hikes you can do in New Zealand. The trail will take you to some of the most diverse landscapes you will see on the North Island of New Zealand.
From the volcanic landscape of Mt. Ngauruhoe or Mt. Doom, for those Lord of the Ring fans out there, to the beautifully glistening Emerald Lakes, all compressed into an 8-hour day hike that you can easily do... if you have come prepared.
Within this hiking guide, you will find all the information you need to help guide and prepare yourself for the Tongariro Crossing. Without further ado, let's begin with a look at the Tongariro Crossing hiking map.
- The Tongariro Alpine Crossing Hiking Map
- What to Know Before you Hike the Tongariro Crossing?
- The Tongariro Crossing Hike Itinerary
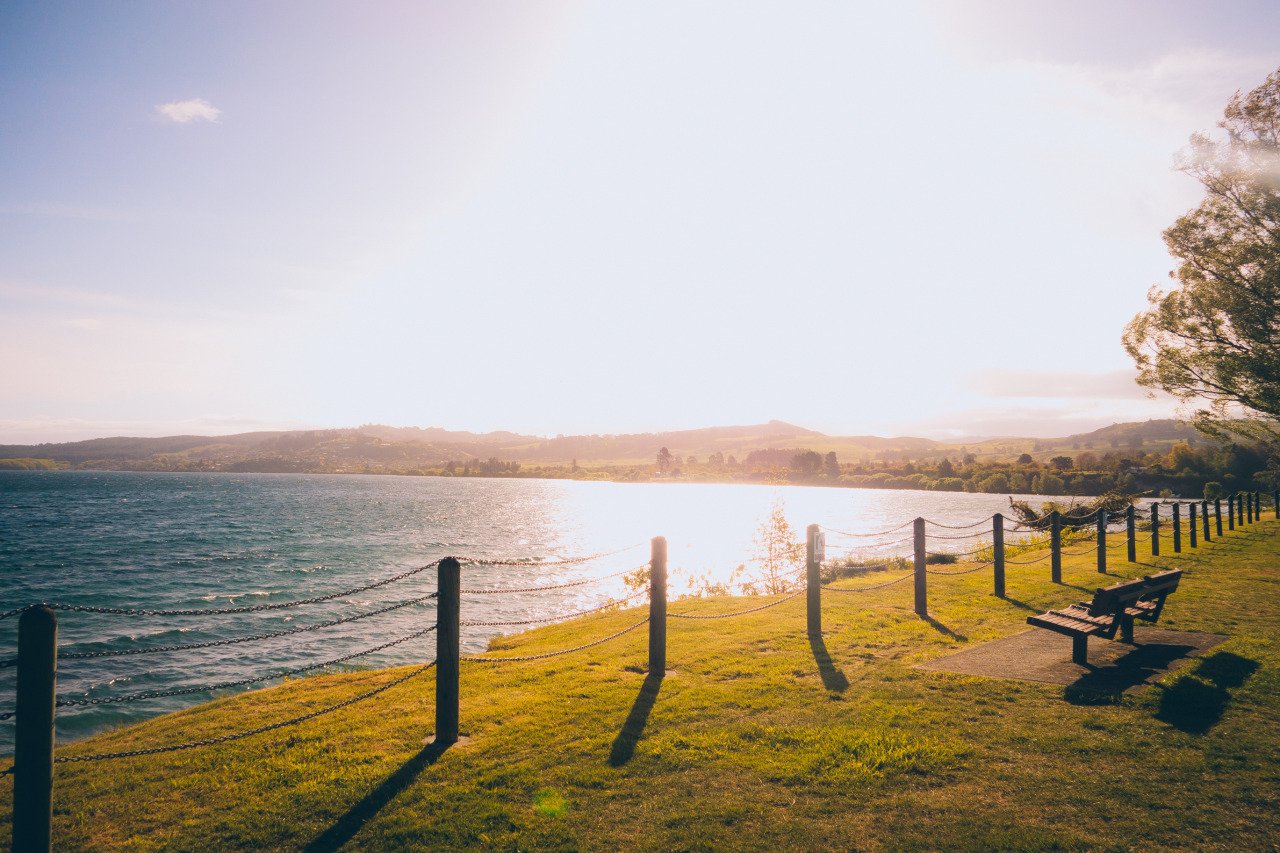
- More Lake Taupo Activities
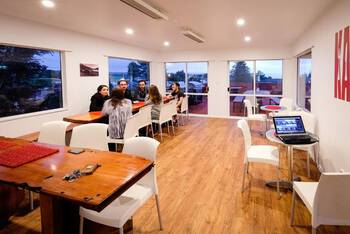
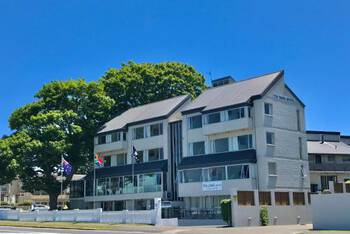
- Where to Stay at Lake Taupo?
- New Zealand Travel Video
- When to Hike the Tongariro Crossing?
- How to Get to the Tongariro Crossing?
- How Long Does It Take To Walk the Tongariro Crossing?
- How Much Does It Cost To Do The Tongariro Crossing?
- Is the Tongariro Crossing Safe?
- Which tourist SIM card is best for New Zealand?
- What to Pack for the Tongariro Crossing Hike?
- Further Reading for Backpacking in New Zealand
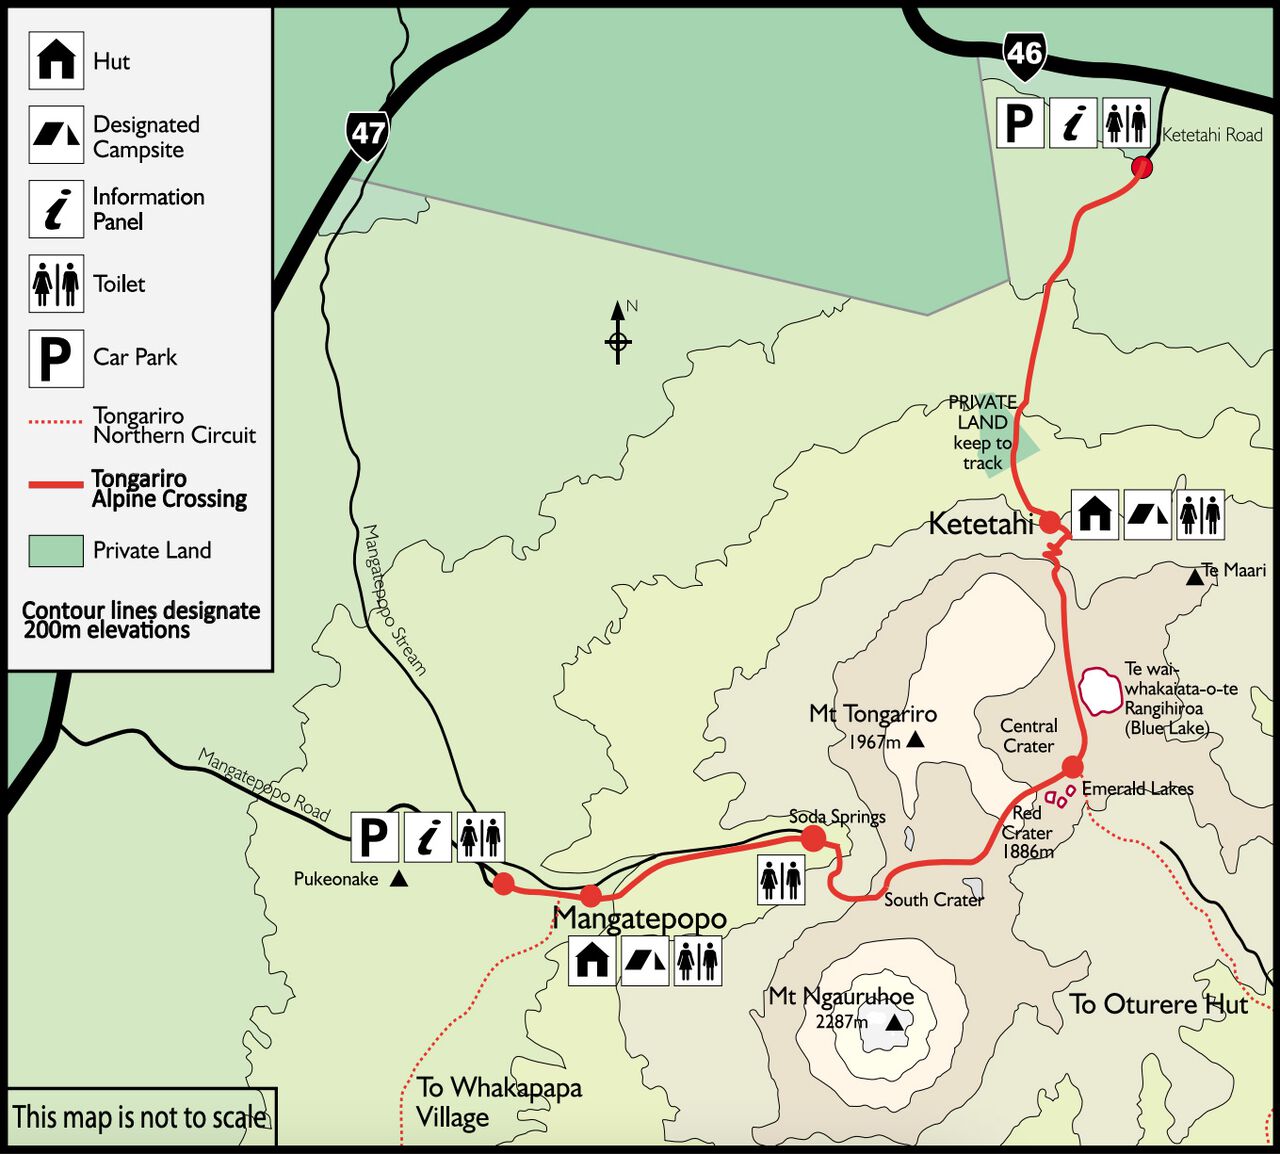
The Tongariro Alpine Crossing Hiking Map
| 🌤️ Best time: | November to March |
| 🚘 Get around: | Hiking and bus |
| 🕓 Time to spend: | 6.5 hours |
| 🚶♂️ Difficulty: | Moderate |
| 💰 Cost: | 108 NZD |
What to Know Before you Hike the Tongariro Crossing?
- Level of Fitness: Since you will be hiking up and down steep mountains, a reasonable level of fitness is also required. It isn't as difficult and physically challenging as hikes like the Everest Base Camp, but it is still an 8-hour walk. If you are an active person, you should be able to do the hike just fine.
- Calculate Your Time: If you are planning to do the side trip as I did and climb Mt. Ngauruhoe, make sure that you reach the Soda Springs before 9 AM. Otherwise, you won't make it in time for the bus because the hike will add 2 - 3 hours on top of the usual trail, so make sure you calculate your time carefully.
- Assess the Situation: Also, if you arrive at the foot of Mt. Ngauruhoe and it is cloudy up there, don't even try to attempt it. It's not worth the trouble. You won't be able to see anything anyway, and the way up is as hazardous as it gets, especially when the visibility is poor. Always assess the situation and always weigh the risk.
- Prepare for the Weather: The weather changes fast up there, so it is important that you have all the gear to handle all these variables. Prepare layers, rain jackets, sturdy boots, and if nothing seems to help you with the weather, be prepared to turn back. It's better to be safe than sorry.
The Tongariro Crossing Hike Itinerary
Mangatepopo Parking Lot to Soda Springs to Mangatepopo Saddle
Difficulty: Easy
Hiking Duration: 1.5 hours
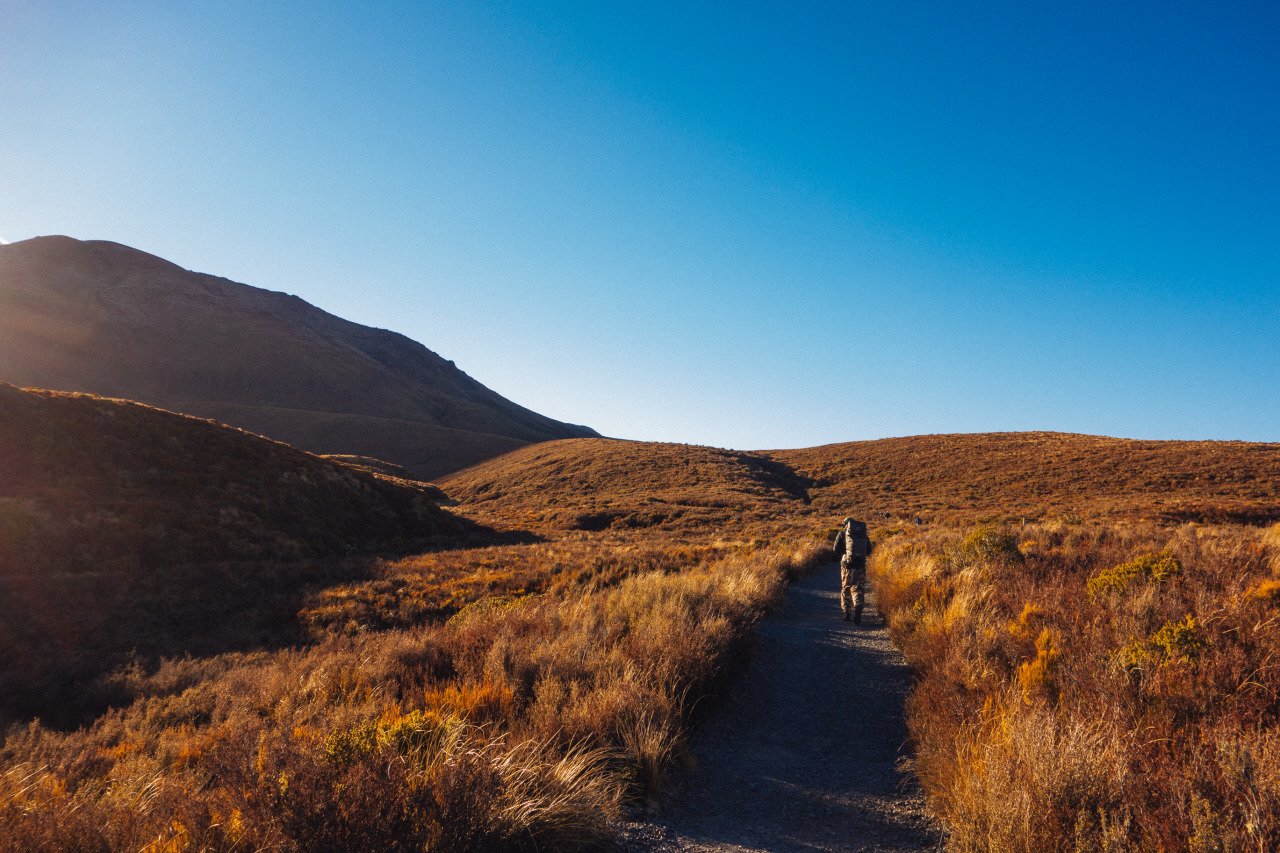
Your Tongariro Crossing hike begins at the Mangatepopo parking lot, where you will be dropped off by the shuttle bus at 8 AM. The trail starts off through beautiful grassland that will take you into the Mangatepopo Valley, where you will find the beautiful Soda Springs Broadwalk.
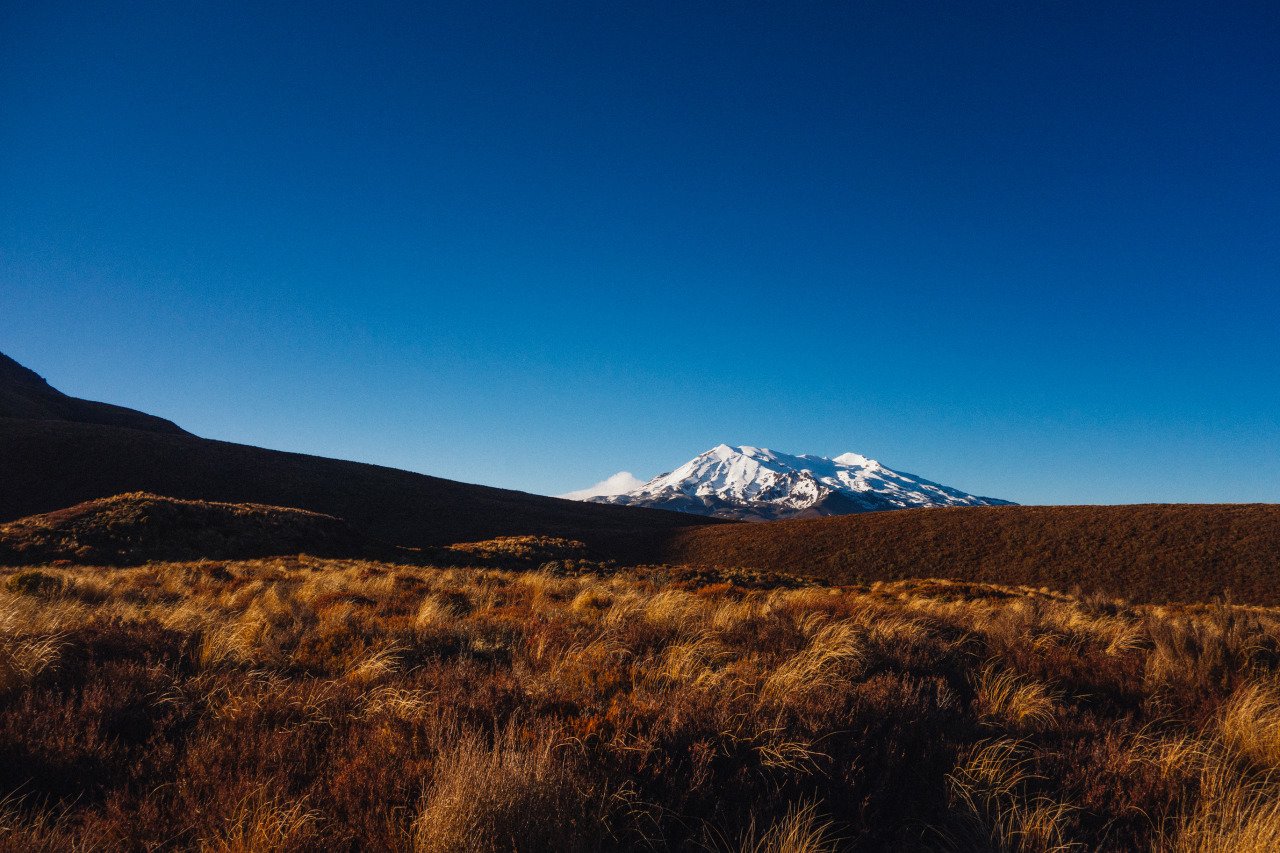
As the trail continues through the grassland, you will be able to see Mt Ruapehu, an active stratovolcano with three iconic peaks over 2,700m above sea level, on your right.
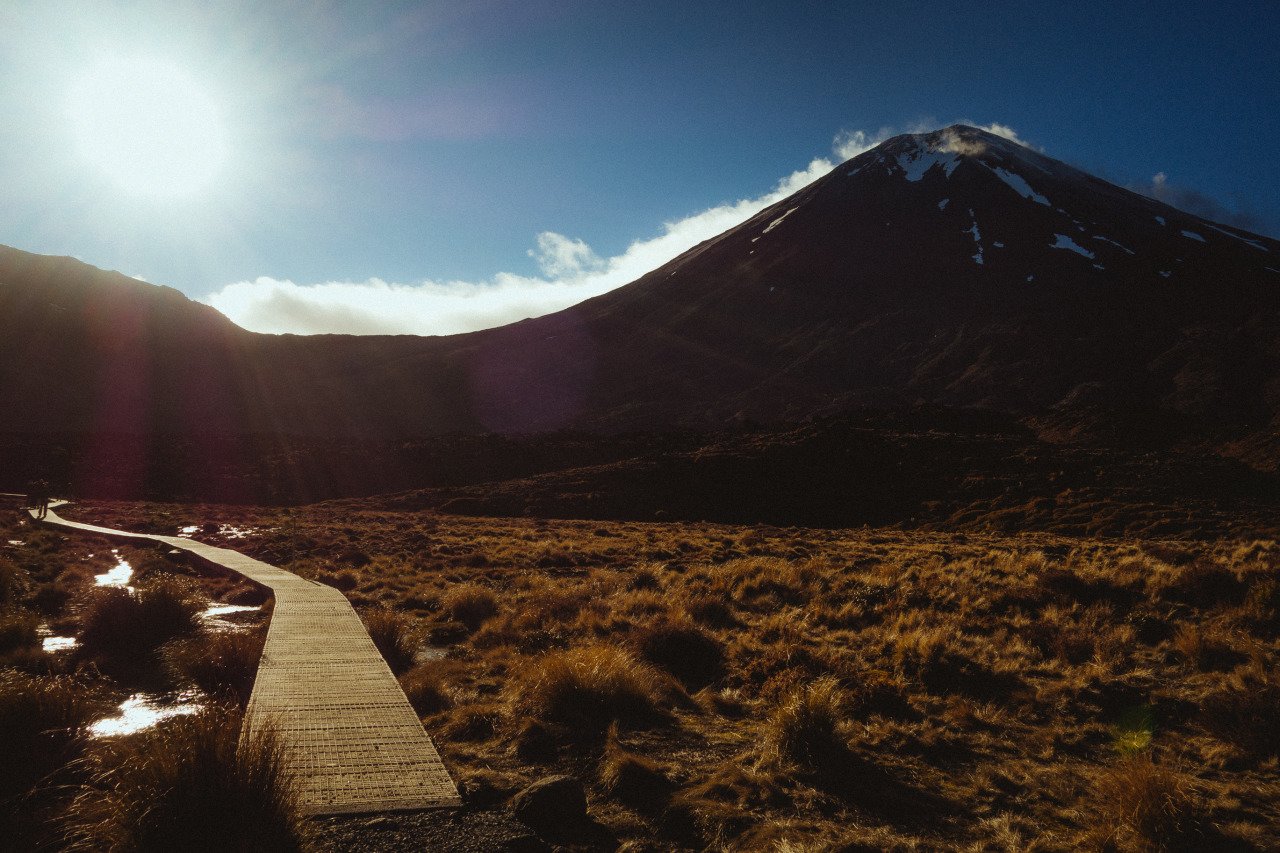
For about an hour, you will arrive at Soda Springs, a beautiful wetland in the middle of the Mangatepopo Valley where you will then have to walk along the wooden boardwalk while Mt. Ngauruhoe or Mt. Doom looms over you.
- Haka Lodge Taupo (Budget)
- Tui Oaks Motel (Mid-Range)
- The Village Resort (High-End)
- Hukafalls Jet Boat Ride from Taupo (30 minutes)
- Daily Scenic Maori Rock Carving Cruise Taupo (1 hour 30 minutes)
- Maori Rock Carvings Scenic Cruise (1 hour 50 minutes to 2 hours)

This section of the trail is pretty easy and straightforward, with a few small ups and downs, and you should be able to complete it in about 1 hour. I couldn't say the same for what comes after Soda Springs, though, as the trail shoots up steeply onto the Mangatepopo Saddle, where you will arrive at the foot of Mt. Ngauruhoe.

No time to read?
Don't worry. You can save this page to Pinterest and come back later.
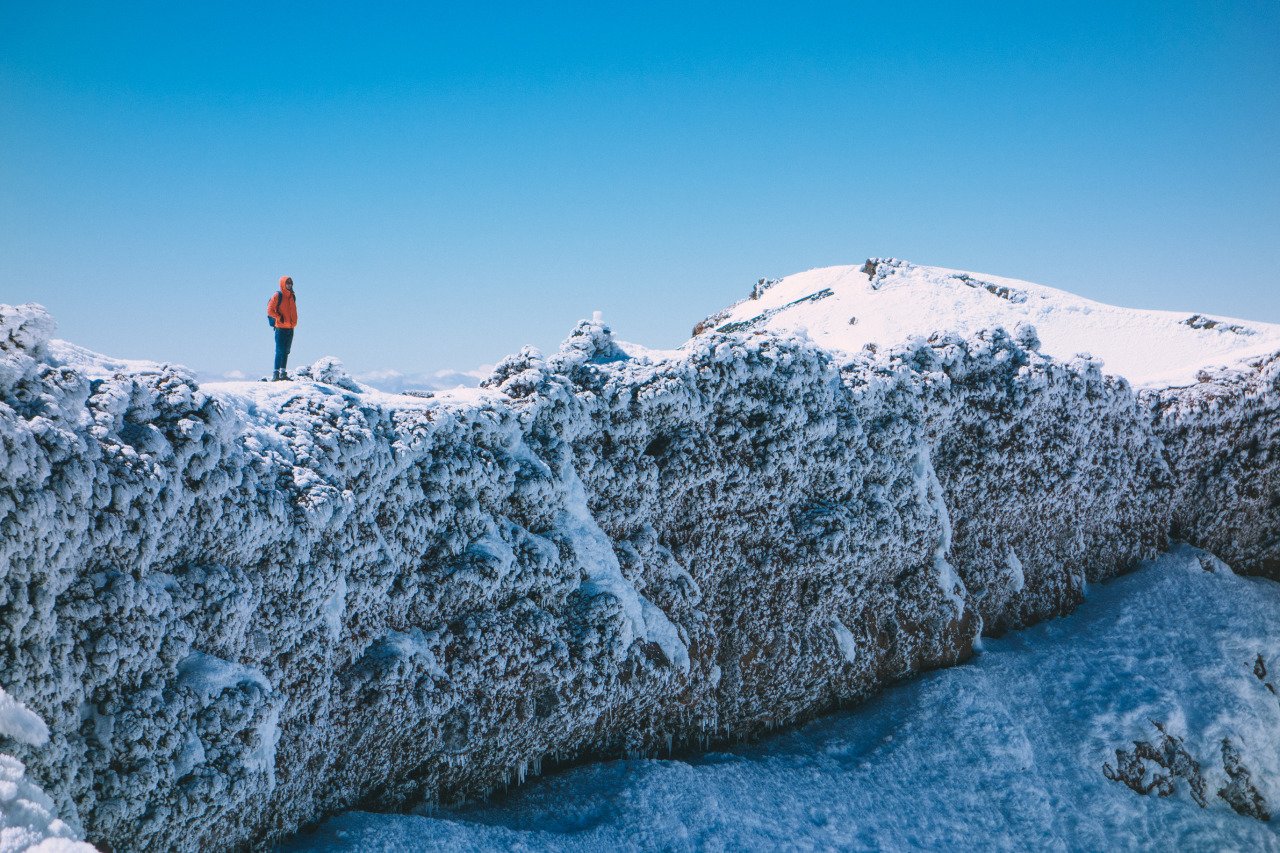
Mangatepopo Saddle to the top of Mt Ngauruhoe/Mt. Doom (Optional)
Difficulty: Extremely difficult
Hiking Duration: 2 hours
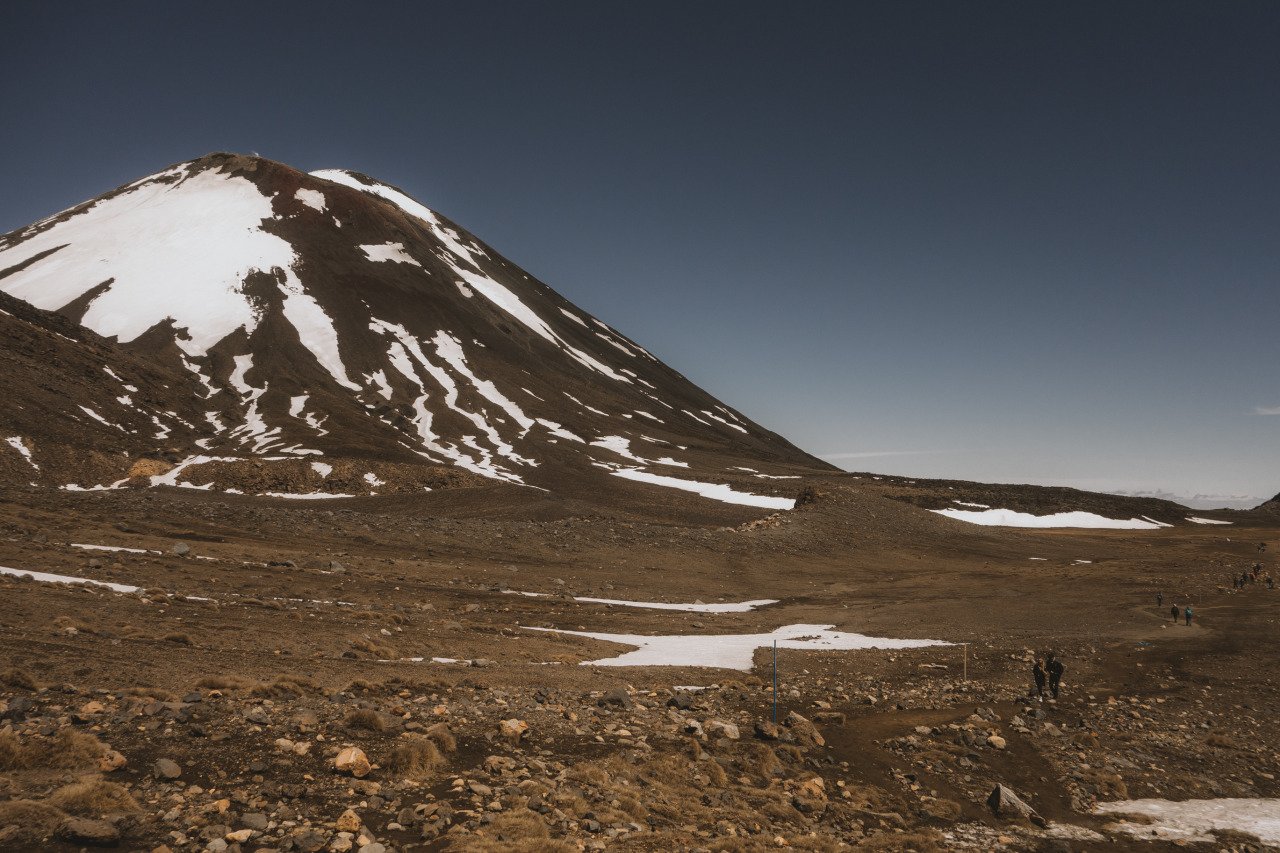
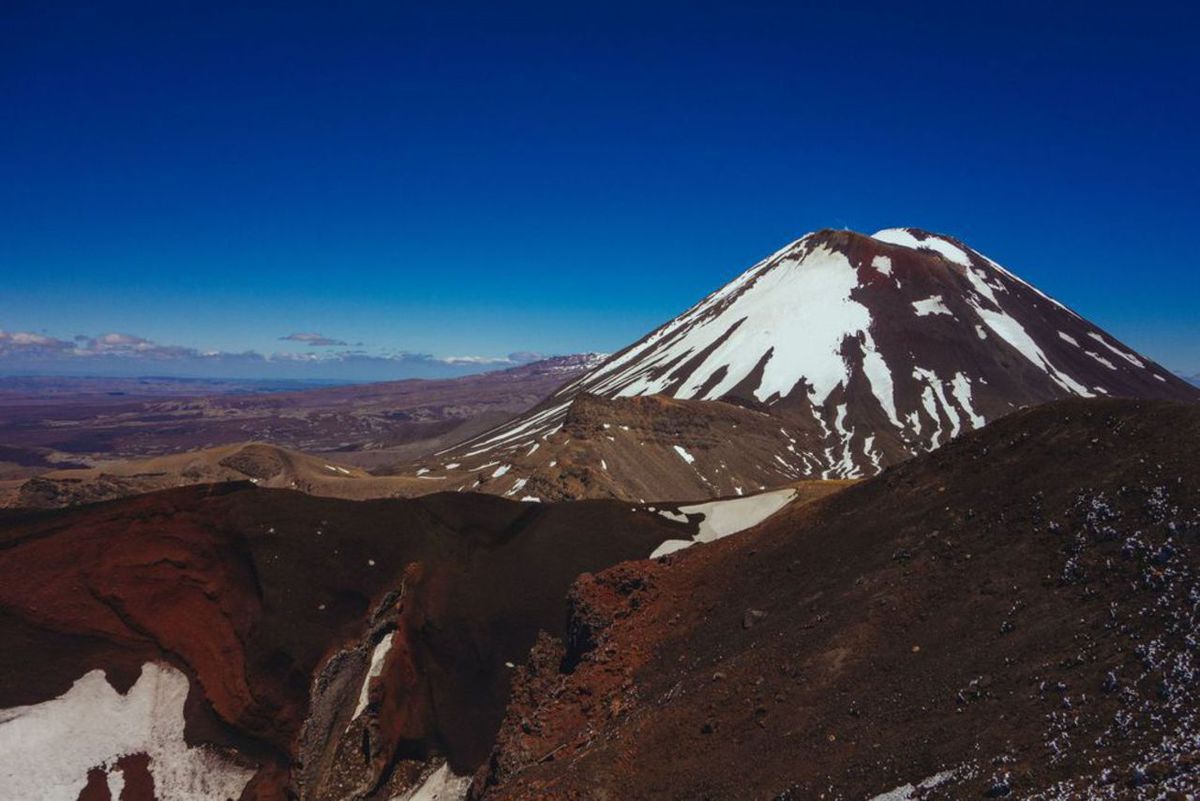
Hiking to the top of Mt Ngauruhoe/Mt. Doom is an optional side trip I highly recommend for those who are looking for a real adventure at the Tongariro Crossing. This mountain is an active stratovolcano that inspired Peter Jackson's version of Mt. Doom in his trilogy Lord of the Rings.
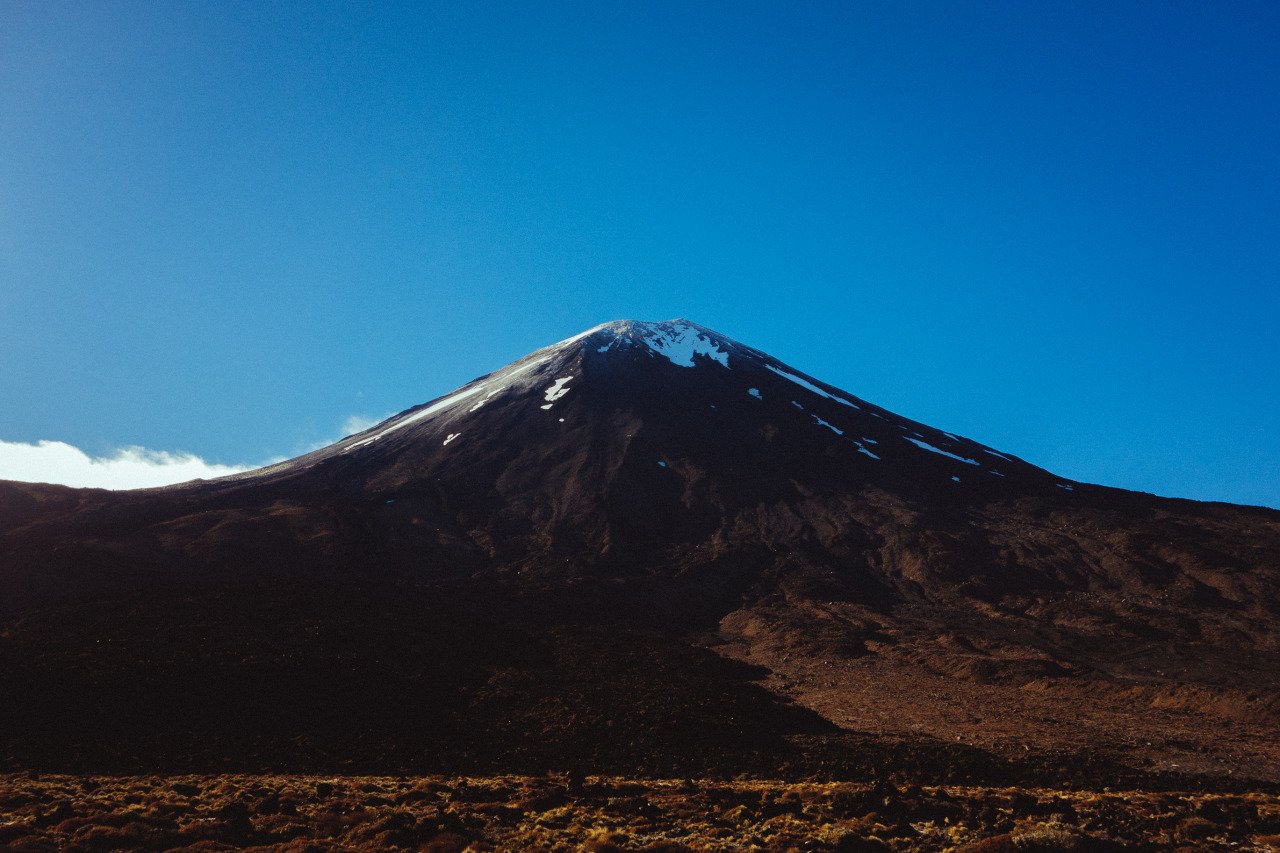
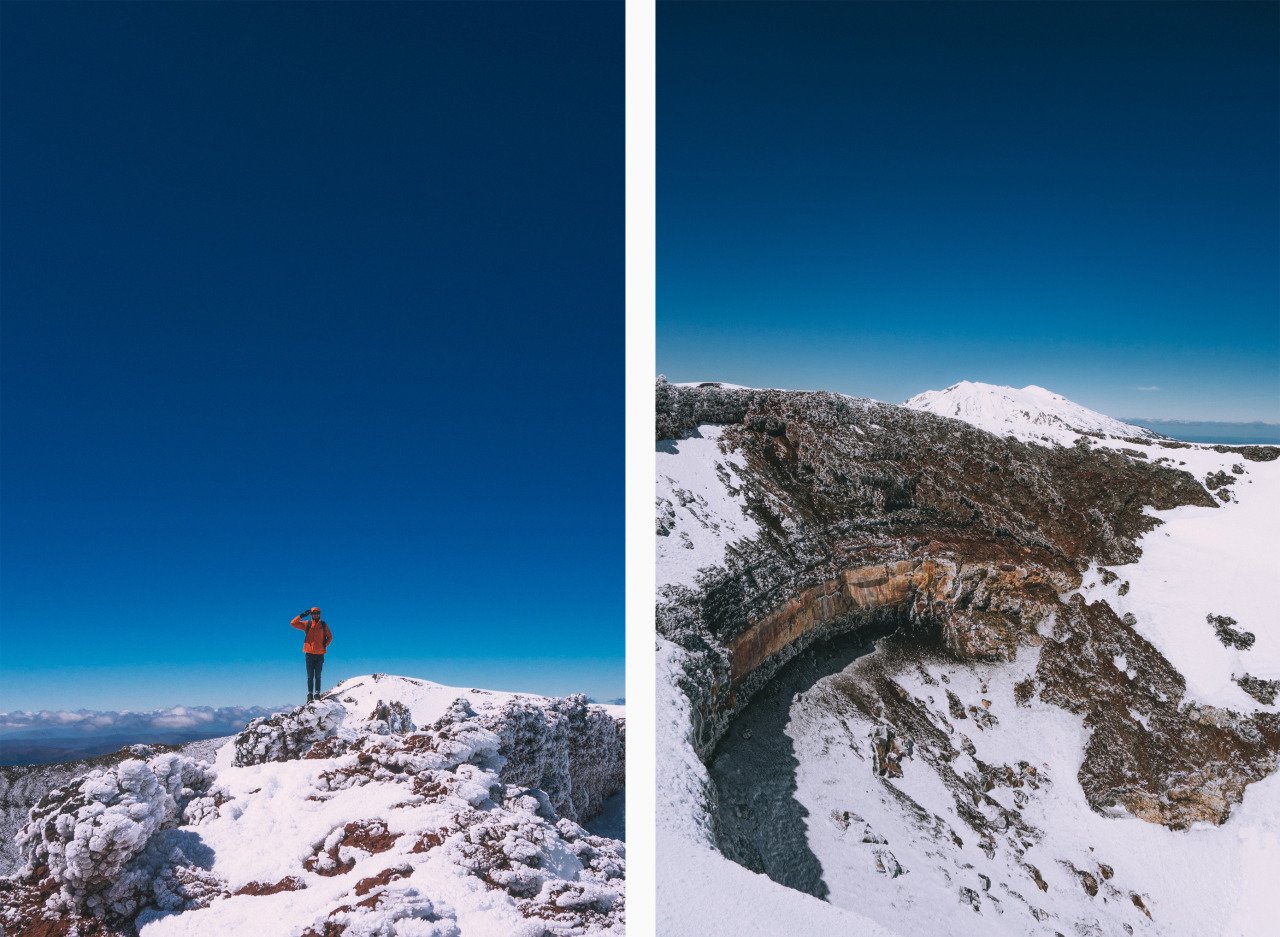
The mighty mountain, with its red-colored soil laden around its massive crater, is as intimidating in real life as it was to Frodo in the Lord of the Rings films.
There is no denying that in order to tackle this mountain, it would require a great deal of fitness and determination. If you have these qualities when you are at the foot of Mt Ngauruhoe, the mountain will reward you with a stunning view of the mountainous landscape of the North Island, as well as a view of Mt. Taranaki, one of the most perfect cone-shaped stratovolcanos you will ever see in New Zealand.
Once you arrive at the foot of Mt Ngauruhoe, check two things: first, take a look at your watch and see what time it is. If you arrive before 9:30 AM, you should have enough time to tackle Mt. Ngauruhoe. Anything later than that, you won't be able to get back to the shuttle bus in time; don't even bother climbing.
Secondly, take a look at Mt Ngauruhoe and check whether you can see the summit. If the peak is covered in clouds, do not attempt the climb. This is the most dangerous part of the hike, as you will be walking on an extremely steep, unmarked trail and you will not find any rope to assist you in the climb.
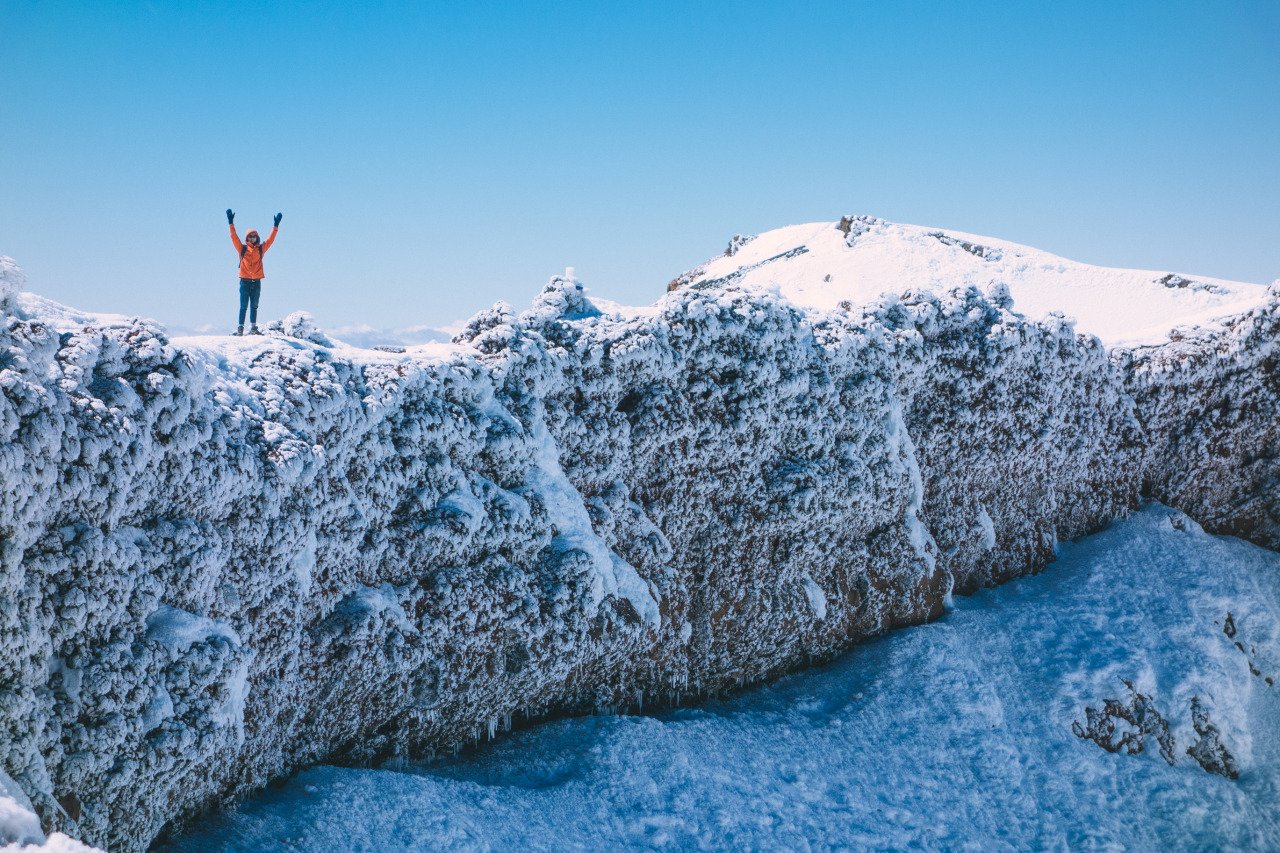
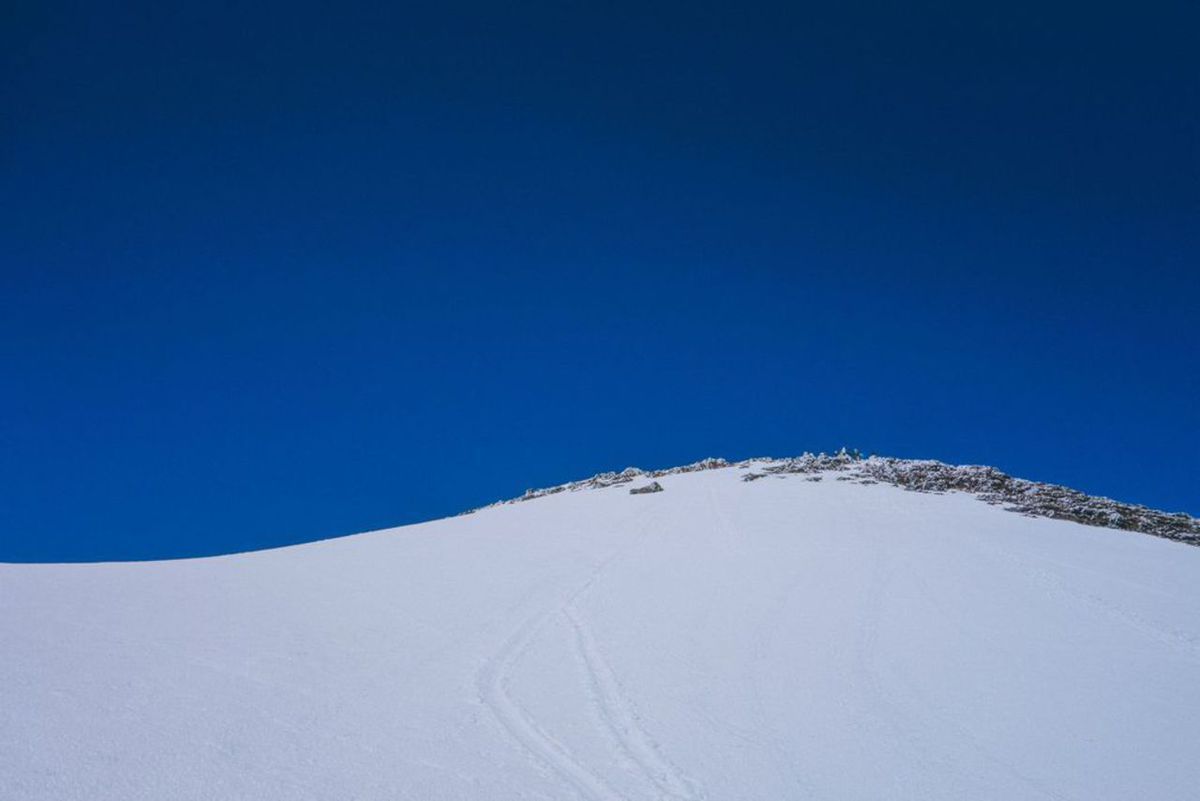
It's all you and the mountain from this point on, and you only need the perfect conditions to succeed. There will be other people attempting the climb, so you can follow their trails up. Otherwise, you can just hike up along the area where there is no snow, and you should arrive at the top in about 2 hours.
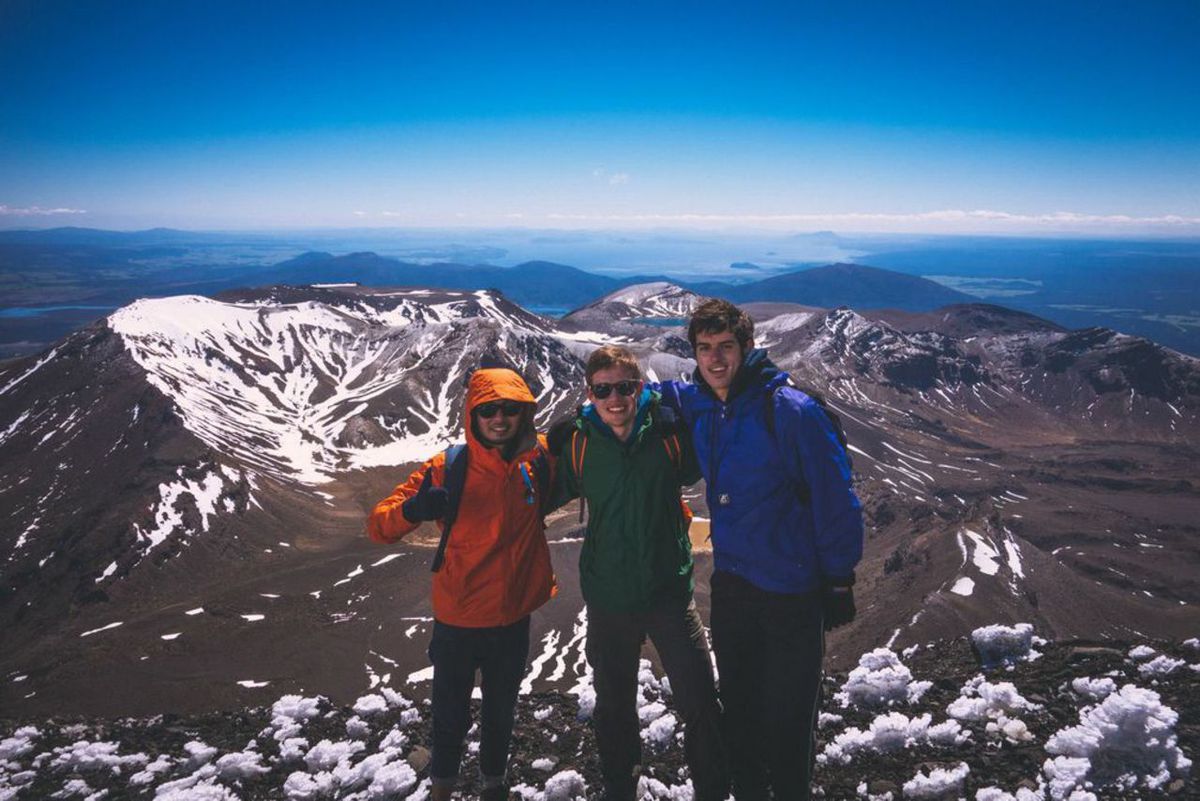
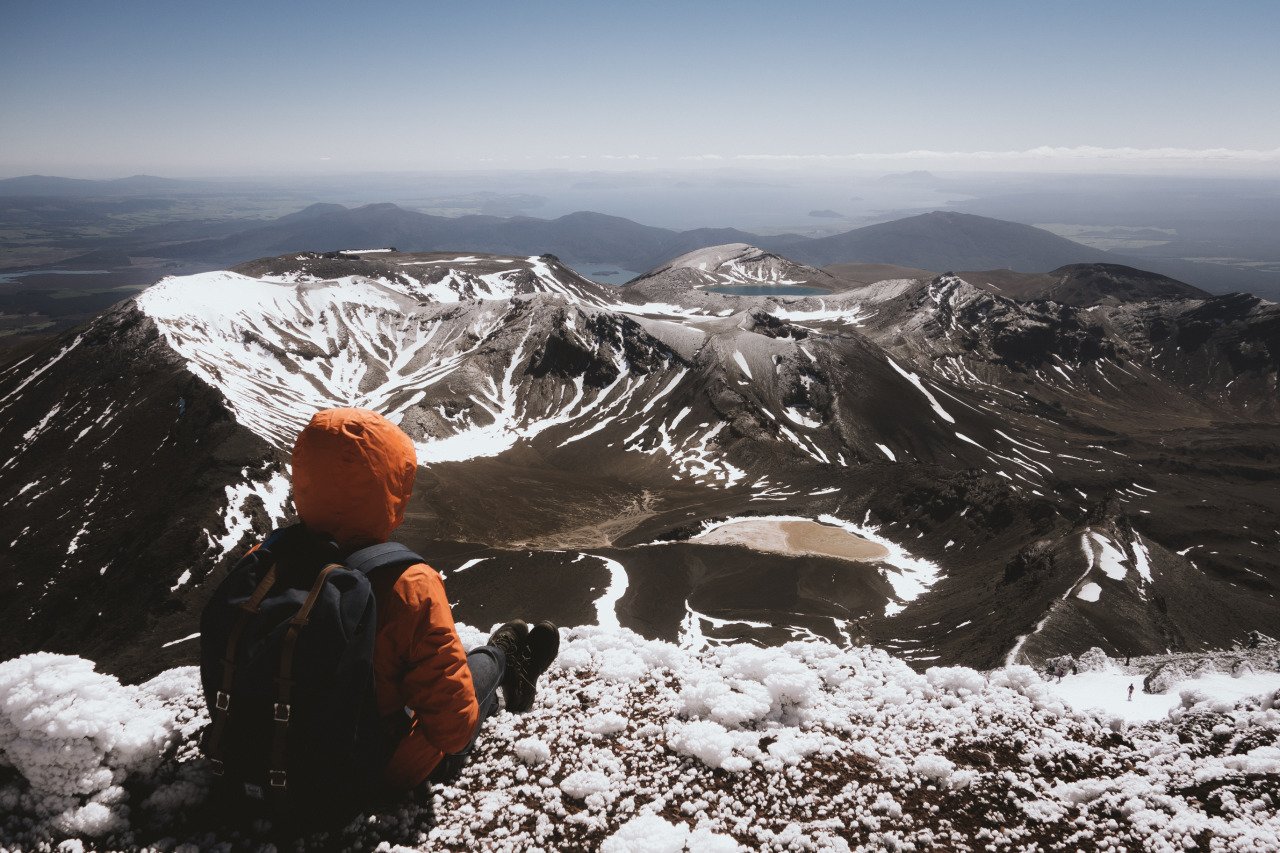
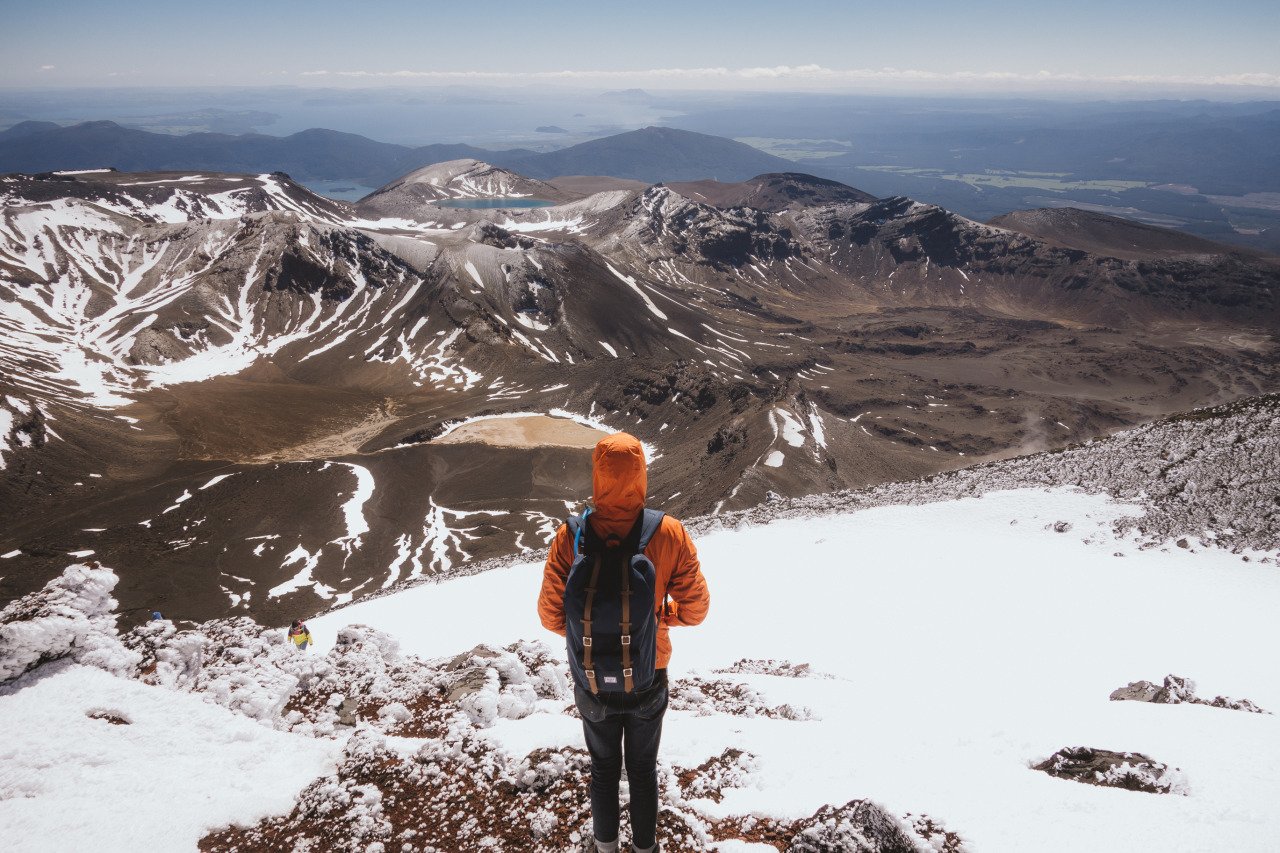
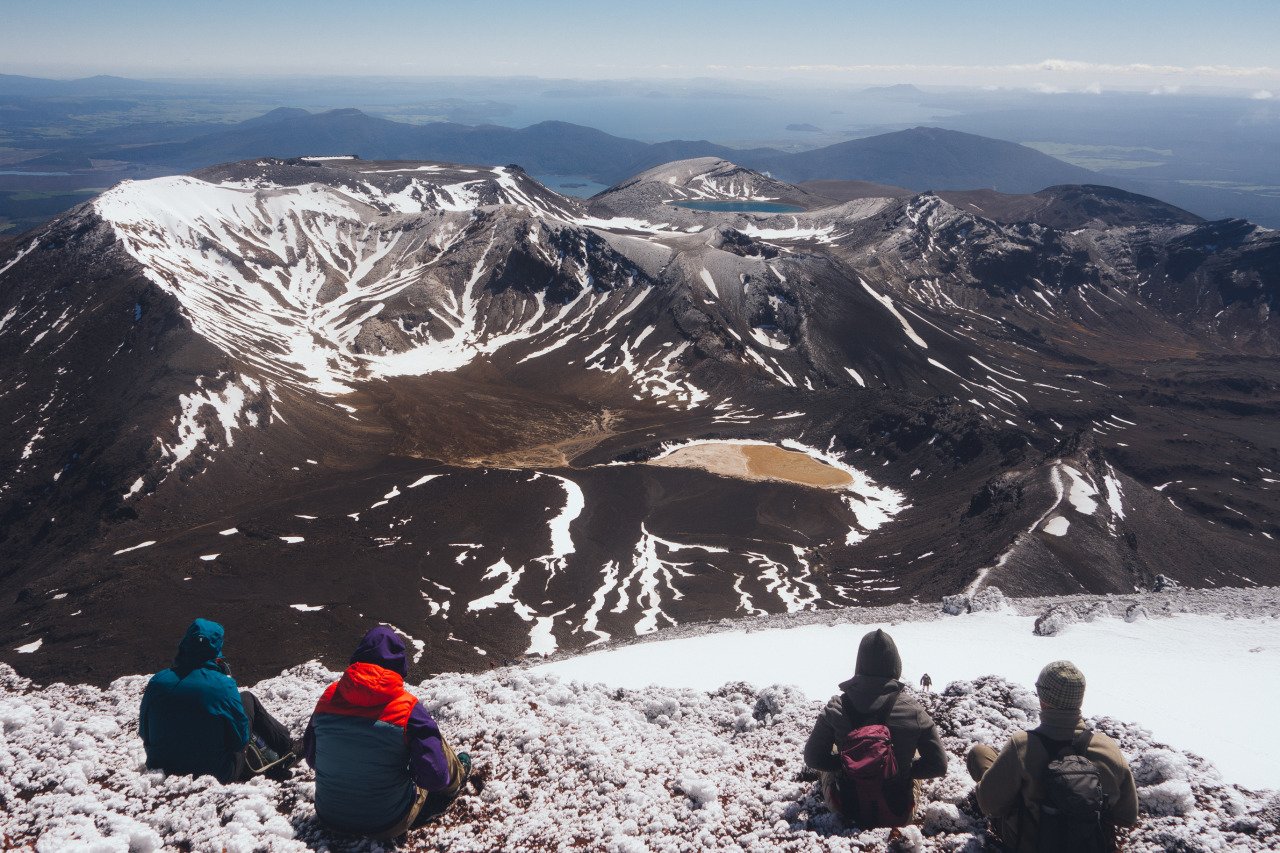
Once you are at the top, you will be able to see one of the most stunning sceneries in New Zealand with a clear view of the Tongariro Crossing hike in its entirety, Mt. Tongariro, Mt. Taranaki, and, on a clear day, you can see the ocean from here. The moment you see the view up there, you will know right away that you have made the right choice.
Getting down is rather easy, as all you have to do is slide down the same way you came up from. It should take about 30 minutes to get down to the foot of Mt. Ngauruhoe, where you can continue on the Tongariro Crossing hike. Be very careful not to trigger a rock avalanche when you slide down.
I saw a rock fall down and ricochet the snow so fast that it created such a speed that could have been extremely dangerous for the hikers down the mountain if it were to hit someone. Thank God, no one got hit by it.
Mt Ngauruhoe (Mt. Doom) to South Crater
Difficulty: Easy
Hiking Duration: 1 hour
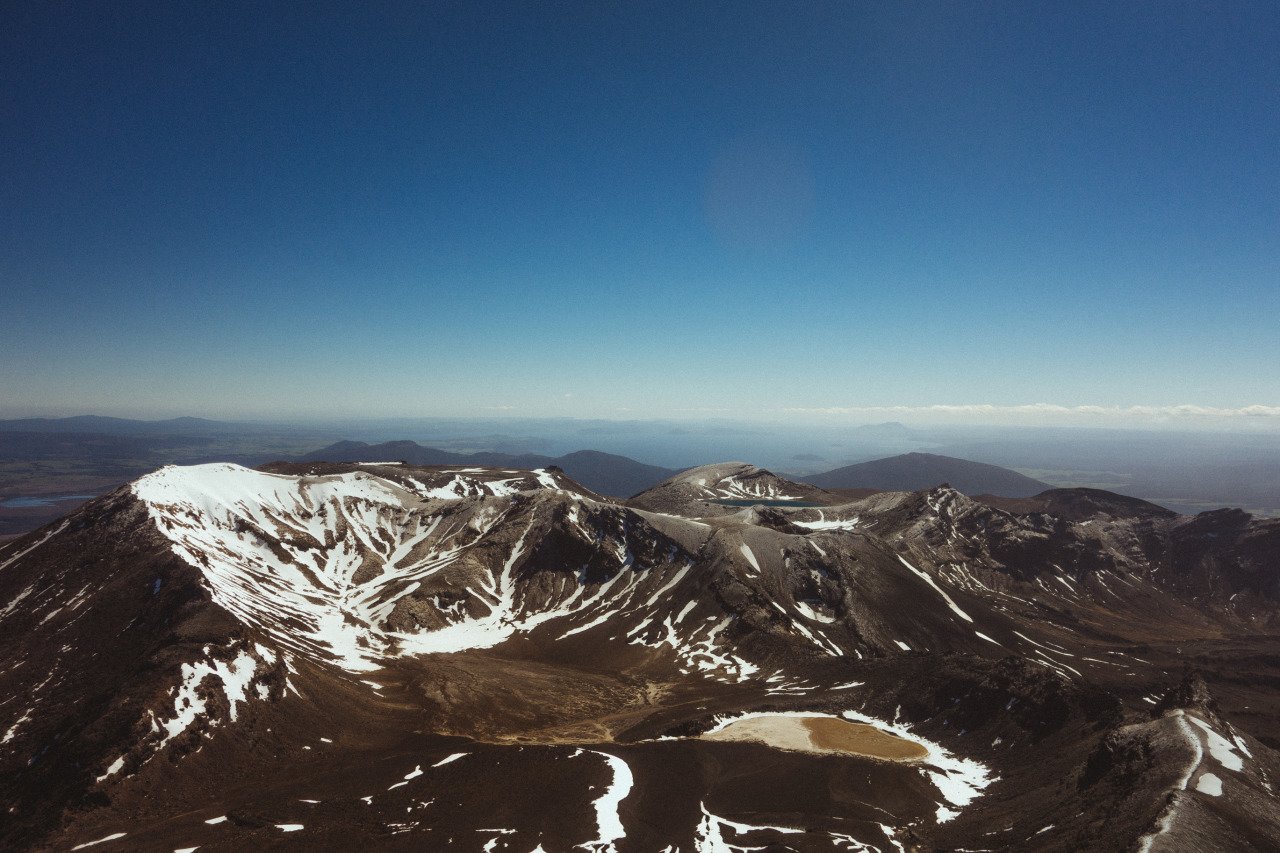
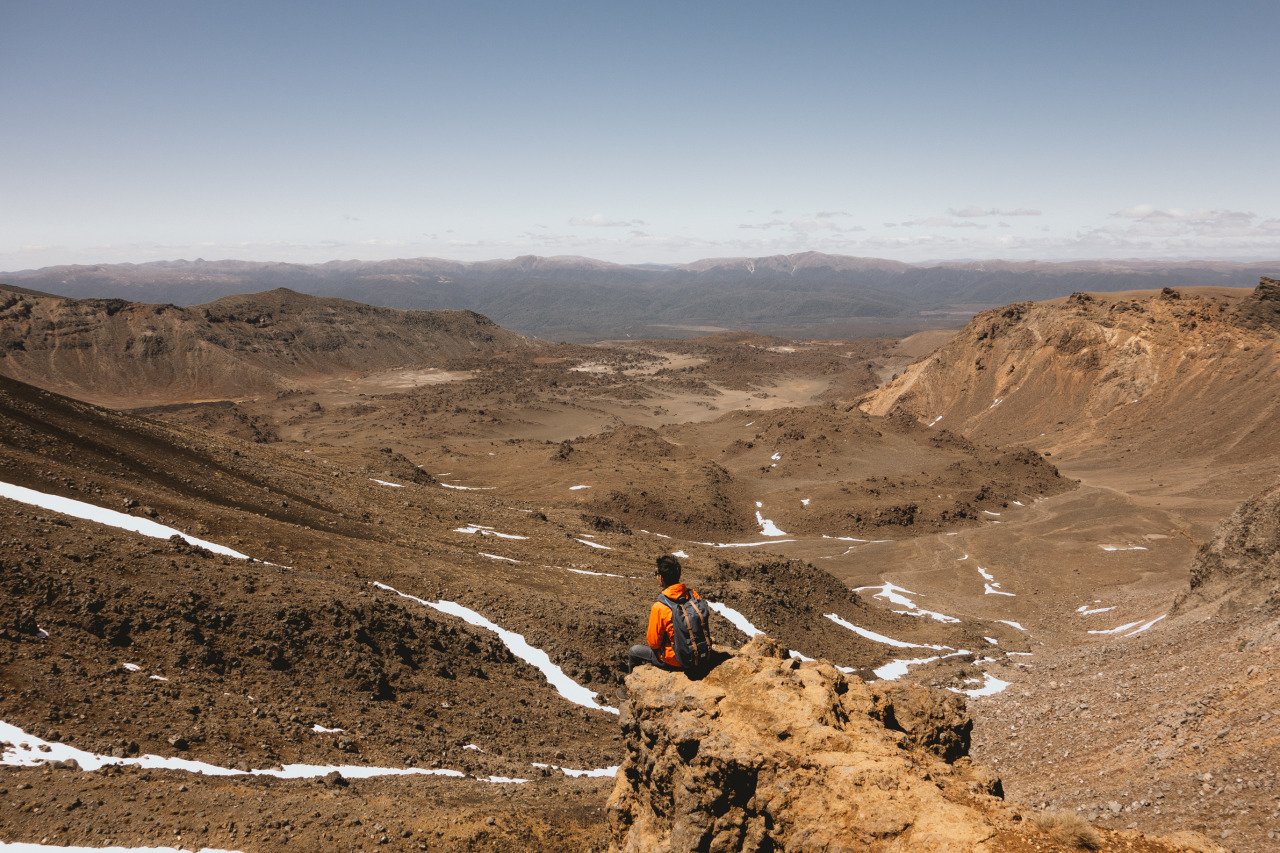
Once you are done with Mt Ngauruhoe, any other sections of the trail will seem easy for you, as you have already completed the hardest part of the hike. The next section of the trail will take you down into the South Crater, a vast barren land between Mt Ngauruhoe and Mt. Tongariro that is not actually a crater but a basin created over 14,000 years ago.
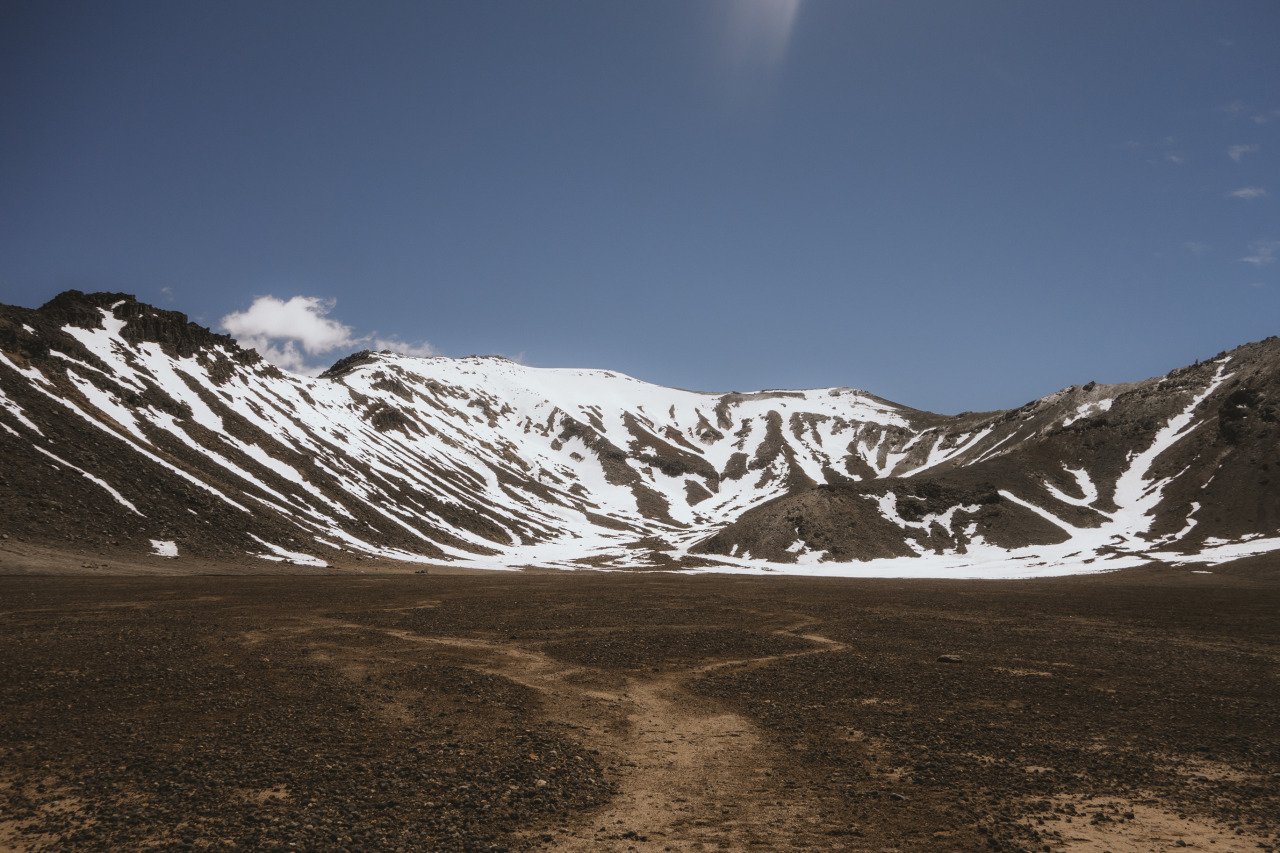
The South Crater's vast terrain will allow you to appreciate the scale of Mt Ngauruhoe and Mt. Tongariro and witness just how active and beautiful the Tongariro Crossing hike is. The trail is an easy stroll along flat terrain for about an hour. When you arrive at the Red Crater, you will have to climb again.
South Crater to Red Crater
Difficulty: Moderate
Hiking Duration: 1 hour
The Red Crater is the highest point of the main Tongariro Crossing trail, standing at around 1900m above sea level. The higher you climb up the Red Crater, the more you will smell sulfur, a sign that you are walking on a very active mountain.
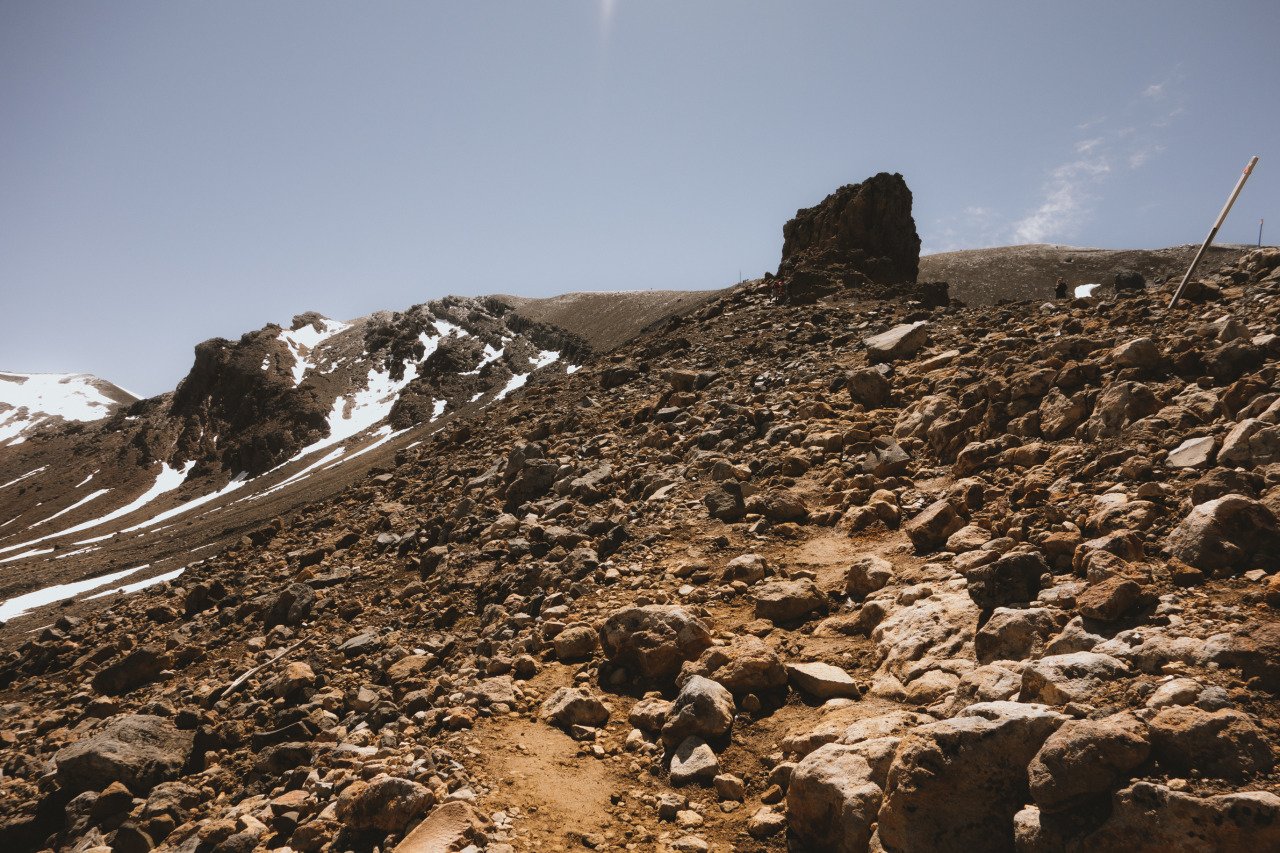
The ascent up the ridge of the Red Crater is quite steep, and this is where you will start to feel the toll it took to hike Mt. Ngauruhoe early on. At least, the trail up the Red Crater has chains that will help you haul yourself up to the top.
Once you arrive at the ridge of the Red Crater, you will know exactly why it is called the Red Crater. The sloped-down crater exposes the black volcanic soil that was mixed with these red elements, giving the crater its name. You can literally feel the heat coming out from the ground here with your hands.
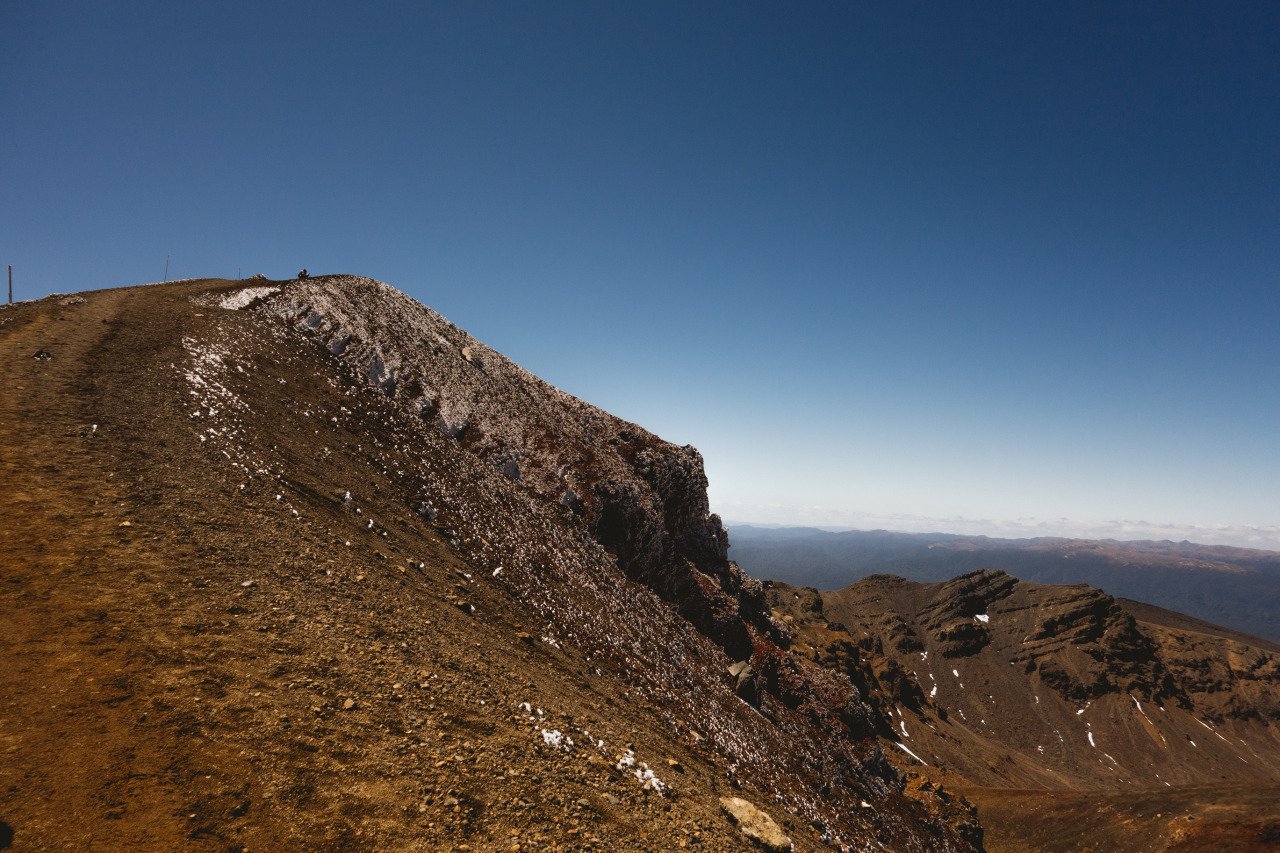
At the top of the Red Crater, you will also be able to enjoy the spectacular views of the Oturere Valley, Rangipo Desert, and Kaimanawa Ranges before the hike continues to the Emerald Lakes.
Red Crater to Emerald Lakes

Difficulty: Easy
Hiking Duration: 15 minutes
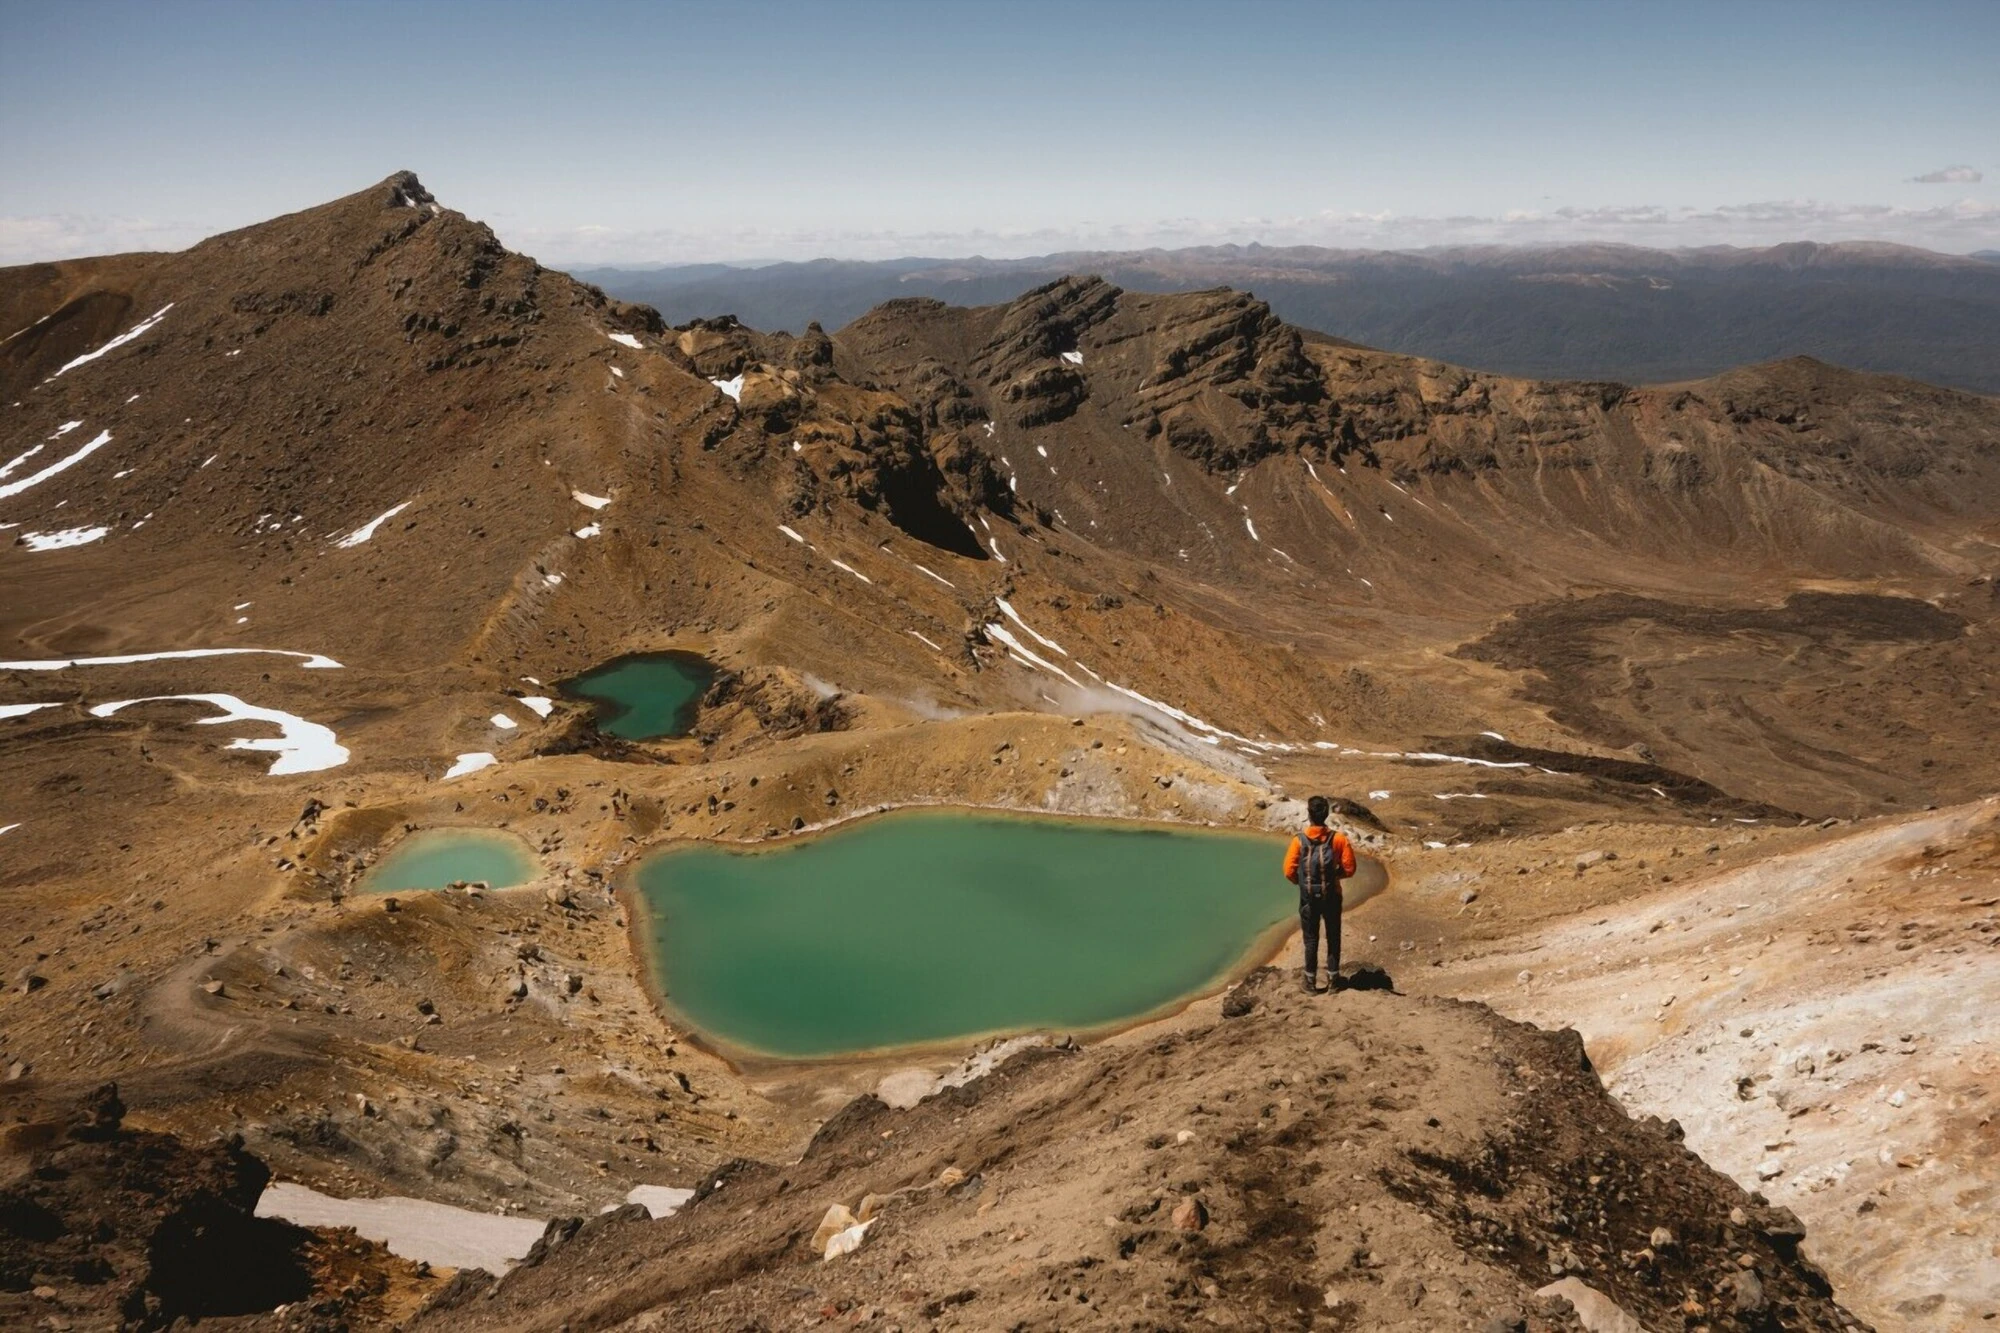
The Emerald Lakes are one of the many reasons why one would want to hike the Tongariro Crossing. These three photogenic, emerald-colored lakes being surrounded by an alien-like landscape are quite a sight to behold.
As you descend down the Red Crater, you will be able to see these beautiful lakes from above. You can stop here for a bit and rest or have lunch before you continue down. From the Red Crater to the Emerald Lakes, the trail is all downhill, and it should take you about 15 minutes to complete.
Emerald Lakes to Ketetahi Hut
Difficulty: Easy
Hiking Duration: 1 hour
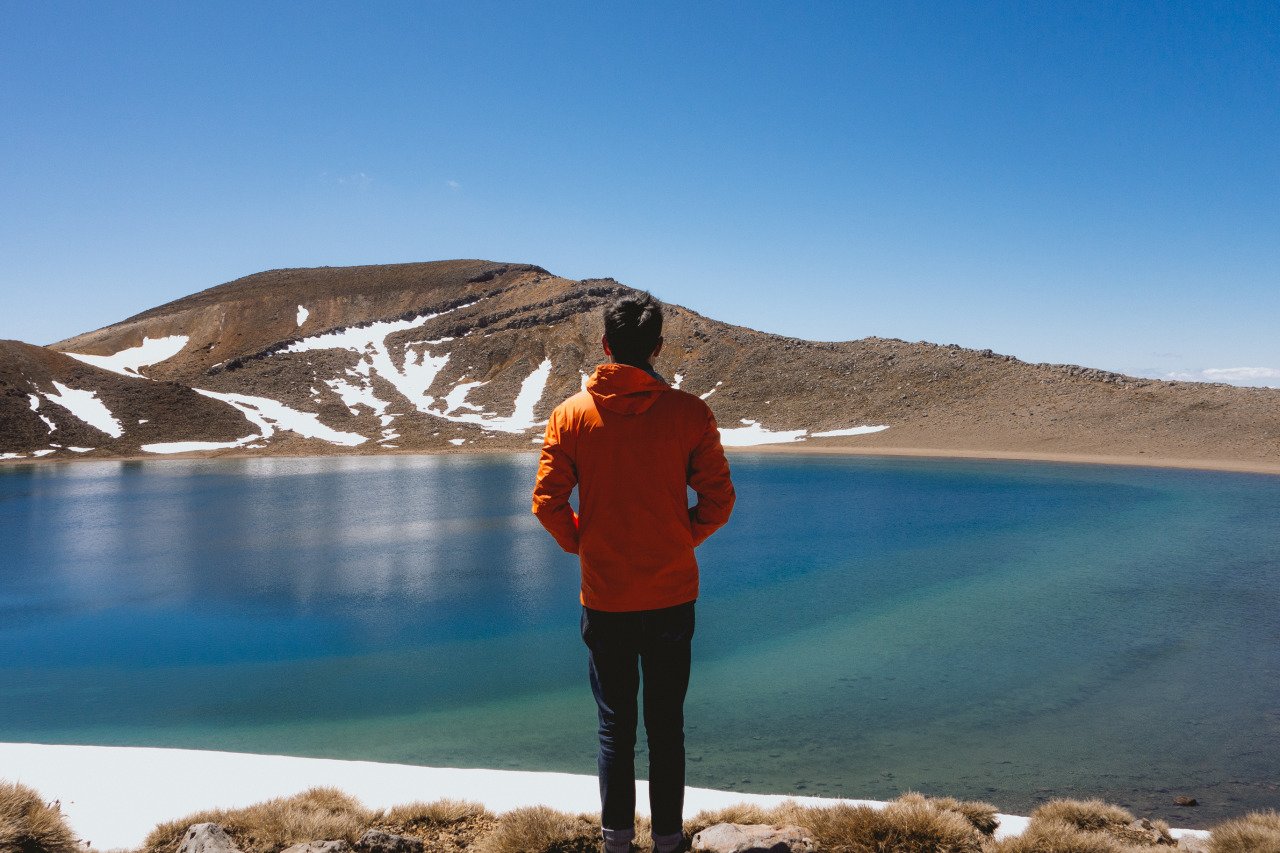
Once you descend from the Red Crater, you will arrive at the Central Crater where you can continue through the barren land until you reach another climb that will take you to the Blue Lake, another beautiful body of water along the Tongariro Crossing trail.
The Blue Lake is formed from the acidic element in the water that came from the nearby volcanoes and is considered sacred to the Maoris. It is beautiful but not as nice as the Emerald Lakes, in my opinion, because you can't appreciate it from above. It should take you around 30 minutes to get from the Emerald Lakes to the Blue Lake.
Once you are done at Blue Lake, the trail will descend into the valley, so it will be all downhill from here on out. As you continue down the trail, you will start to see the shift back in scenery from the barren lands of the craters to the similar grassland you saw at the beginning of the trail.
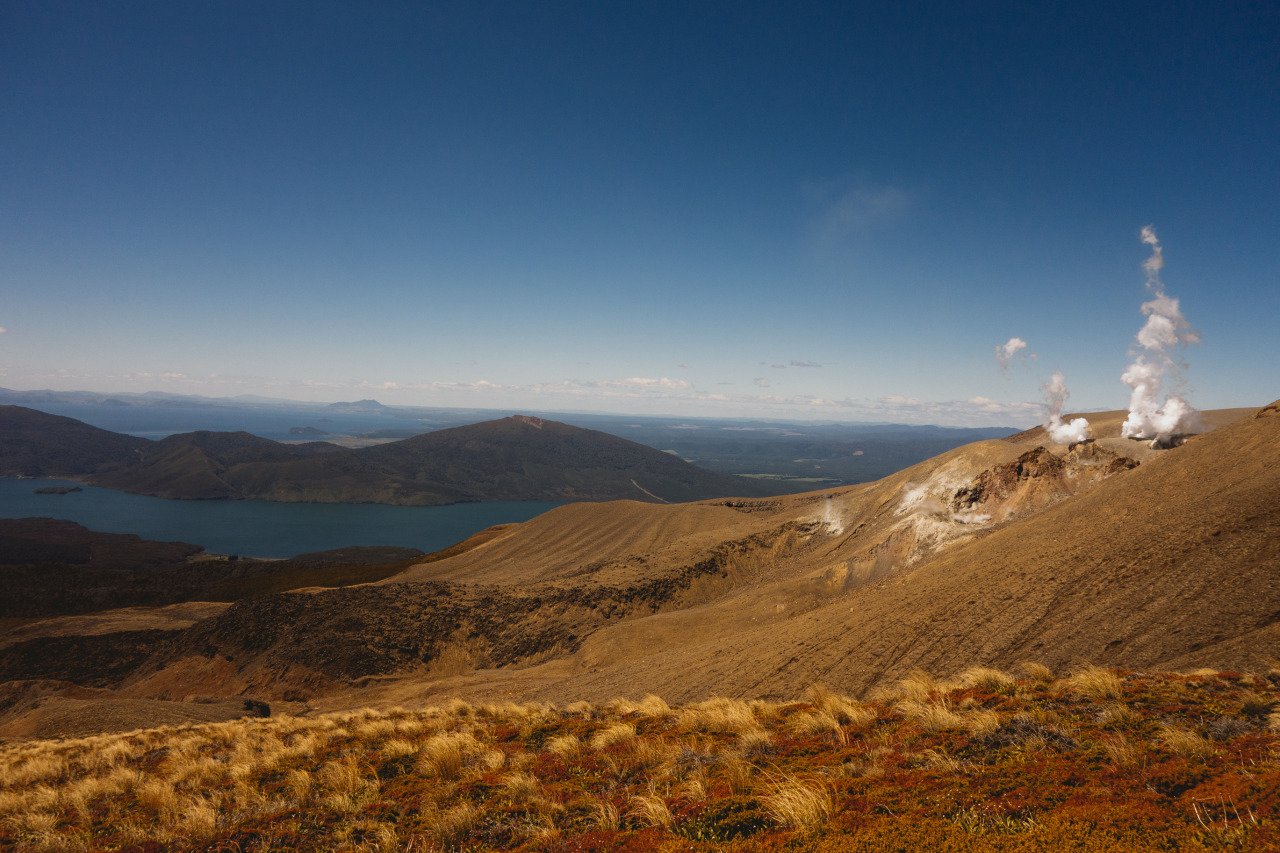
The trail is rather winding and can get a bit repetitive as you zig-zag down the mountain while the view barely changes. One point of interest along this section of the trail is the recently formed steam-spewing crater of Te Maari where, if there is going to be an eruption at the Tongariro Crossing, it would be this one.
Continue down the valley for about an hour, and you will arrive at Ketetahi Hut, where you can take a short toilet break before continuing down the mountain.
Ketetahi Hut to Keetahi Parking Lot
Difficulty: Easy
Hiking Duration: 1.5 hours
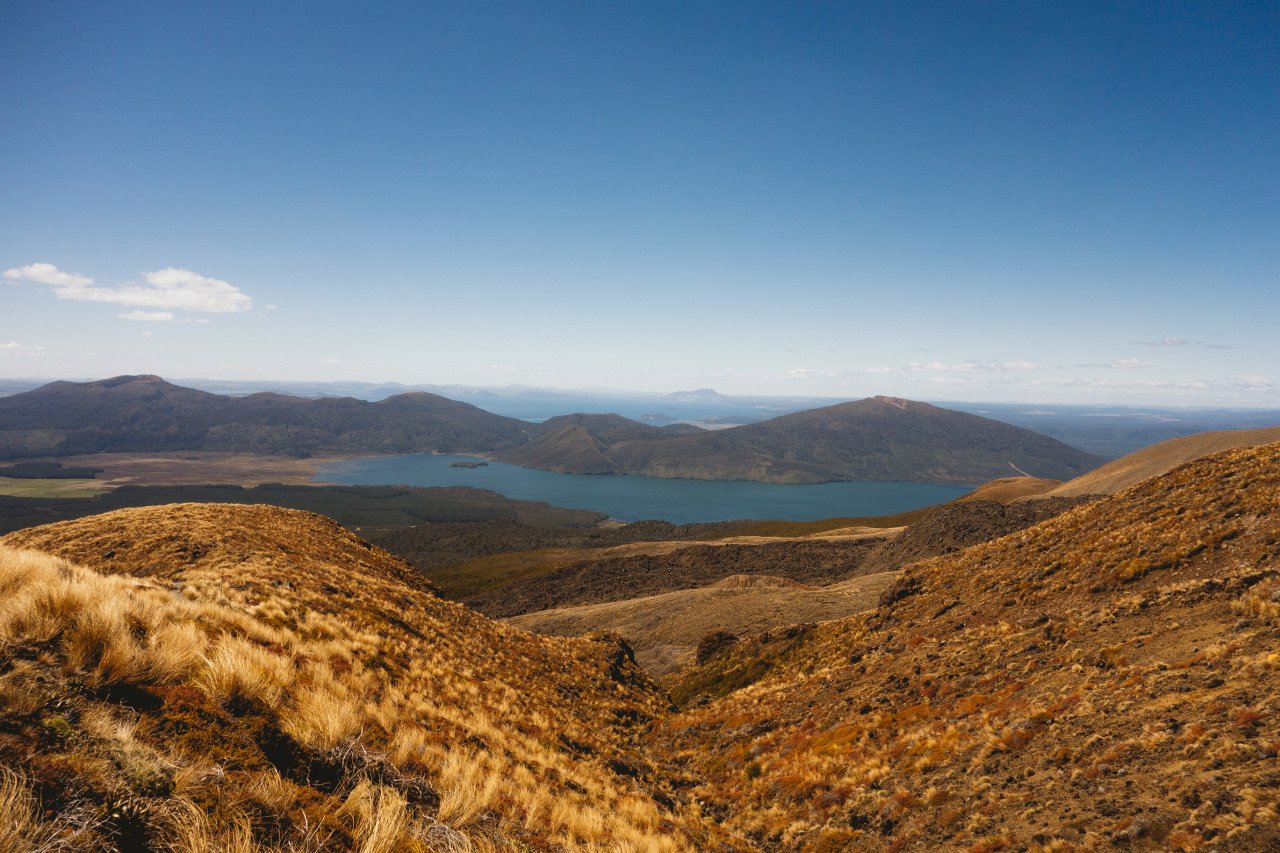
From the Ketetahi Hut, it is another 1.5 hours of walking downhill with not much to see along the trail, except for the vast, beautiful grassland and the thick forest where you will be ascending into.
Once you find yourself in a forest, you should be back at the Keetahi Parking Lot in no time, where the shuttle bus that dropped you off in the morning will be waiting for you.
It should take around 1.5 hours to walk from Ketetahi Hut to the parking lot, and by that point, your energy should be so depleted that you would want to do nothing more than to get back to Lake Taupo, enjoy a nice shower, a healthy portion of dinner, and a good night's sleep before you tackle your next adventure the next day.
More Lake Taupo Activities
Where to Stay at Lake Taupo?

When to Hike the Tongariro Crossing?
The best time to hike the Tongariro Crossing is in the summer months, beginning from November to March, when the weather is warmer and most of the Tongariro Crossing hiking trail is snow-free, making it a little easier and less dangerous to tackle.
It will also get quite touristy. So, if you want to avoid the crowds, I would recommend visiting the shoulder season instead, which is from September to November and March to May.
You will see considerably fewer travelers during this time, while most accommodations will offer discounted prices, making your trip way more cost-effective than if you visit during the summer.
That said, the weather at the Tongariro National Park can change at an alarming speed, so you must be prepared for all weather conditions. When you start the hike, the weather may be fine, but once you are up there in the mountains, anything is possible. So, do not expect your hike to go as planned, even during the summer months in New Zealand.
How to Get to the Tongariro Crossing?
In order to get to the Tongariro Crossing, you will have to make your way to Auckland, the main travel hub of New Zealand, where most international flights fly in and out of the country.
From the US, there are no direct flights to Auckland, so you will have to rely on transit flights from airlines like Qantas. These flights often transit in Fiji and take about 19 hours.
From Europe, you can fly from the most popular European hubs like London, Paris, or Frankfurt via Lufthansa, Qatar, Emirates, or Singaporean Airlines, where you will then have to transit through their headquarters to get to Auckland. The flight will take over 24 hours, so gear up and prepare for a long ride.
From Asia, there are several airlines offering various routes from many hub cities such as Singapore, Kuala Lumpur, Tokyo, Jakarta, Bangkok, and Hong Kong that will fly you directly to Auckland. Cathay Pacific, Air New Zealand, and Singapore Airlines are excellent choices for traveling this route, with the fastest flight time being 9 hours.
To find a cheap flight to New Zealand, I would recommend you use Skyscanner or Expedia to look for the cheapest route and schedule so that you can compare and pick the best one.
Getting from Auckland to Lake Taupo
By Air: Lake Taupo has a small airport where Air New Zealand often flies regularly from Auckland. You can fly from Auckland to Lake Taupo in about 50 minutes and it costs around 34 USD. You can book your flight here.
By Bus: Taking the Intercity Bus is a great and affordable way to get around New Zealand. There are 6 buses per day that run between Auckland and Rotorua, starting at 9:15 AM and ending at 7 PM. The bus will drop you off at Intercity's Taupo Bus Stop in the city center.
The Intercity bus from Auckland to Taupo will cost you about 59 NZD (40 USD) per person and take you about 5 hours. You can book your Intercity Bus tickets here.
If you are planning to travel longer in New Zealand via buses, I recommend you get the Flexipass where you buy hours, and you can travel any route in the country depending on how long the bus is. It is a great way to hop around the country without having to pay a ton of money.
For more information about Flexipass, please visit the official Intercity Flexipass page here.
By Campervan: One of the most popular ways to get around New Zealand is to rent a campervan, which will allow you to travel anywhere you like and save a ton of money on accommodation by allowing you to sleep at campsites around the country. I recommend you rent a campervan in Auckland and drive to Lake Taupo and the Tongariro Crossing trailhead if you are visiting Lake Taupo as part of a larger trip in New Zealand.
There are several well-known campervan rental companies that I have seen people driving all over the country, such as Jucy, Spaceships, and Britz, so be sure to check them out when you are in Auckland.
By Car: You can rent a car directly from Auckland International Airport for only around 25 USD per day. It takes around 3 hours to drive from Auckland to Rotorua via Hamilton on State Highway 1. You can rent a car with the link below:
Getting from Lake Taupo to the Tongariro Crossing trailhead
By Shuttle Bus: Since the Tongariro Crossing is a one-way hike, you will start at one end and end at the other. Therefore, you will need a mode of transportation that will drop you off at the trailhead and pick you up at the other end.
Thankfully, they have a shuttle bus service that will do just that by picking you up at your accommodation at 5:30 AM and dropping you off at the trailhead at 8 AM. They will be waiting for you at the end and depart at 4:30 PM, giving you around 9 hours in total to hike the Tongariro Crossing.
This is the fastest and most efficient way to get to and from the Tongariro Crossing, even more so than having your own vehicle because, since the trail is one-way, you will have to go back and get your car when you are done if you drive yourself.
To book a shuttle bus to and from the Tongariro Crossing, you can click on the link below:
Book a Roundtrip Shuttle Bus to the Tongariro Crossing
How Long Does It Take To Walk the Tongariro Crossing?
The Tongariro Crossing trail is over 20km long, with a few side trips you can do if you have the time. On its own, without doing the side trips, you can expect the hike to be around 6.5 hours long, excluding rest and photo stops.
If you are including a side trip, I recommend climbing to the top of Mt. Ngauruhoe (Mt. Doom). Then, you can expect to hike for at least 8 hours.
It took me around 8 hours to complete the Tongariro Crossing, as well as the Mt. Ngauruhoe side trip. I started hiking from the Mangatepopo parking lot at 8 AM, and I was at the Keetahi parking lot at 4 PM.
How Much Does It Cost To Do The Tongariro Crossing?
For the entire trip, including a stay at a hostel in Lake Taupo, here is how much it will cost you to do the Tongariro Crossing trail.
Accommodation: For 2 nights at Lake Taupo, you will be spending around 36 USD on accommodations.
Food: An average meal in Taupo is around 10 USD, and you will probably be cooking breakfast and lunch yourself as there is no food along the trail. Therefore, you will be spending around 20 USD for 1 day's worth of food for the trail.
Transportation: The roundtrip shuttle bus to Tongariro Crossing costs around 23 USD.
Activities: You do not have to pay for any activities here as the admission fee to the Tongariro Crossing is free. Awesome, isn't it?
Total Budget for hiking the Tongariro Crossing: 108 NZD (79 USD).
Is the Tongariro Crossing Safe?
The Tongariro Crossing is a trek that goes over steep volcanic terrain, and due to the rapid weather changes up there and the exposure to various elements, the safety of the hike will depend on how prepared you are.
For one, you are hiking on volcanic terrain, so loose rocks and uneven ground are common to find. And since you are hiking up steep mountains, a reasonable level of fitness is also required.
Secondly, there is no stop in between the trail where you can get food or water, so you will have to prepare enough water and food for the whole day and carry them with you. The water along the trail is not suitable for drinking due to the high mineral content.
Thirdly, since the weather changes fast at the Tongariro Crossing, you will have to prepare layers and jackets to protect yourself from the elements the mountain might throw at you. Also, be prepared to turn back when things get hairy, such as when the wind is too strong or visibility suddenly becomes poor.
Lastly, the volcano here is still active, so watch out for noxious gases escaping from vents. Look out for signs of volcanic activity such as earthquakes, rumbling, ash or flowing clouds, or flying rocks. Be prepared to move off the mountain as quickly as you can.
As you can see, the key to staying safe while hiking the Tongariro Crossing is to come prepared and be aware of your surroundings. As long as you know what to expect and you've come prepared for the hike, you should be fine.
Which tourist SIM card is best for New Zealand?
Update: If your phone supports eSIM, I highly recommend checking out Airalo, a global eSIM marketplace. It allows you to stay connected affordably while traveling in Lake Taupo, New Zealand without having to switch out your physical SIM card.
Gone are the days when you needed to scramble to find a local SIM card at an airport upon arrival. You can purchase an eSIM before your arrival, and you'll be good to go. If your phone doesn't support eSIM, here is how you can get a local SIM card in Lake Taupo, New Zealand:
Don't expect much from New Zealand's WIFI. They are terribly outdated, with some cafes offering free 25 MB and 15 minutes time-limited WIFI to their customers. Yes, really!
For a more reliable internet connection, I would recommend that you get yourself a local SIM card where you will be able to find a 4G connection in all the major cities around the country now.
Spark is a recommended carrier with the most coverage throughout the country. You can purchase their prepaid SIM card "Data Lover" package at the airport in Auckland, which is available in 2 price points: 20 NZD for 1 GB (+1 GB for social) and 40 NZD for 4.5 GB (+1 GB for social). Both packages are valid for one month.
With Spark, you can top up your data via stores around the country, or you can simply do it online with your credit card. Very easy and convenient.
For more information about SIM cards in New Zealand, visit: New Zealand's Prepaid Data SIM Card
Tips: To stay connected with people at home, be sure that you have a VPN, such as ProtonVPN, installed before traveling. It's FREE, and you can gain access to services that may be blocked in certain countries.
What to Pack for the Tongariro Crossing Hike?
Since you will be exposed to all kinds of elements while hiking around volcanic terrain up there, you will have to come prepared for anything. Here are a few things you should prepare before you hike the Tongariro Crossing:
- Water bottles: It can get hot up there if the sun is out, and you will likely be dehydrated from climbing steep mountains, so make sure you have enough water for the rest of the day. I recommend you get at least 2-3 liters of water for the hike. I always carry my 2-liter hydration pack, which I recommend so you can stay hydrated without stopping.
- Sturdy Shoes: The trail can be very rocky at times and can be slippery if it rained the day before, so be sure your shoes can handle that. This Timberland Shoe is my go-to hiking boot in most situations.
- Layers: The weather changes alarmingly fast up there, so having layers where you can switch in and out very quickly is important. It may be sunny at the parking lot, but the more you gain elevation, the colder it gets. Here are the jackets I recommend you get for the trip: fleece jacket and the beautiful orange Columbia outer-shell jacket.
- Lunch and snacks: You cannot buy any food anywhere on the trail, so be sure to prepare your breakfast and lunch the day before. Also, consider buying a lot of energy bars just in case you get hungry along the way.
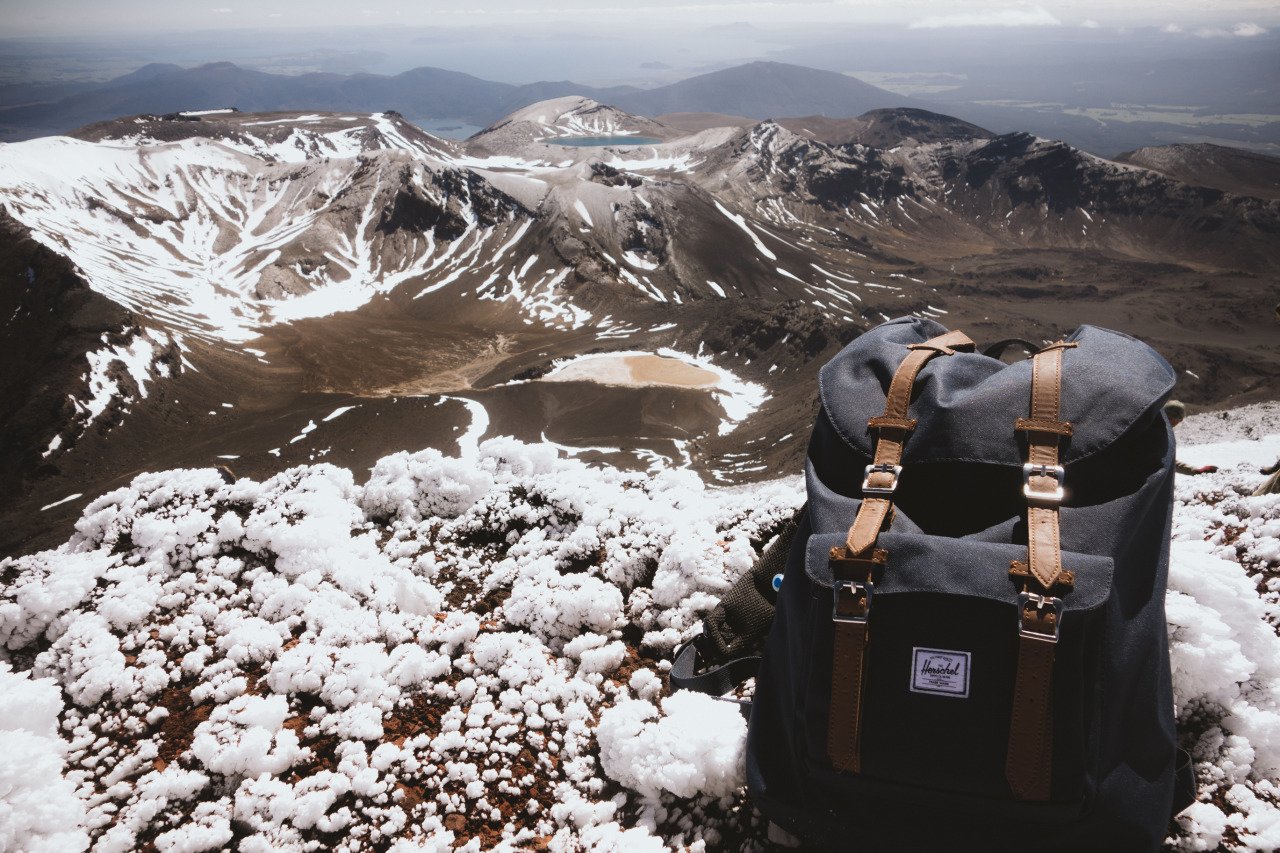
- A Daypack: You will need a daypack to carry all your gear, as well as those 2-4 liter water bottles which are heavy as hell. During the hike, I use Herschel Supply's Little America Backpack to carry everything with me. It has great back support, good capacity, and is stylish as hell.
Check Out My Hiking Packing List

That is it for A Complete Hiking Guide to the Tongariro Crossing, New Zealand. Have we missed anything? Have you found the guide useful? Let us know in the comments below!
Now that we have all the information we need, it's time to plan your trip to Lake Taupo, New Zealand! Here are some resources to help you get your trip going:
Are you planning to travel to Lake Taupo, New Zealand independently? Be sure to check out my guide on How To Plan A Backpacking Trip here.
Further Reading for Backpacking in New Zealand
I’ve spent 5 weeks backpacking in New Zealand, and I have written a ton more about my journey traveling throughout New Zealand, from the North Island to the South Island, that might help you in your trip planning.
Here's a selection of articles about New Zealand.
- Looking for a comprehensive backpacking itinerary for New Zealand? Check out One Month Itinerary for New Zealand.
- Don't have one month in New Zealand? How about spending 2 weeks visiting all the highlights of New Zealand on the South Island? Check out our 2-Week Itinerary for the South Island, New Zealand.
- Want to visit New Zealand but not sure what to pack? Here's a packing guide to help you: What to Pack for New Zealand
- Planning a trip to New Zealand? Here are the 12 Best Places to Visit in New Zealand.
- New Zealand has a special place in my heart. It is one of the most memorable trips I have ever done, and here are 10 things I love about New Zealand.
- If you are planning to travel from North to South in New Zealand, Rotorua is a great place to start your journey from Auckland. Here are the 7 Best Things to Do in Rotorua.
- Planning to travel across Cook Strait from Wellington in the North Island to Picton in the South Island? Here's How to Get From Wellington to Picton.
- Nelson is one of the most laid-back and sunny cities in New Zealand, making it a great place to relax and enjoy the abundant sunshine. Here are the 7 Best Things to Do in Nelson.
- Did you know that you can do parts of New Zealand's Great Walks in one day? The Abel Tasman Track offers a wide range of hiking trails to choose from. Here's The Ultimate One Day Hiking Guide to the Abel Tasman Track.
- Want to do a road trip along the Great Coast Road in New Zealand? Better start in Westport. Here are the 5 Best Things to Do in Westport, New Zealand.
- Want to go hiking on a glacier in the Glacier Country of New Zealand? Here is the Ultimate Backpacking Guide to Franz Josef.
- Wanaka is a must-visit lakeside town full of incredible nature and wonderful mountains waiting for you to explore. Here are the 8 Best Things to Do in Wanaka.
- Queenstown is the adventure capital of the world, and whatever extreme activities human bodies can endure, they probably have them in Queenstown. Here are the 10 Best Things to Do in Queenstown.
- Queenstown is also one of the best places in the world to go skydiving. Here’s my experience skydiving with NZONE in Queenstown.
- The Milford Sound is one of the most popular attractions in New Zealand, and it would be a shame to miss it when you are in New Zealand. If you want to visit the Milford Sound, check out: A Day Trip from Te Anau to the Milford Sound.
- One of the best Great Walks in New Zealand is the Routeburn Track, and if you have to pick one Great Walk to do, make it this one. Here’s The Ultimate Hiking Guide to the Routeburn Track.
- Lake Tekapo and Mount Cook are some of the most photogenic places to visit in New Zealand, and it is best to do so together. Here are the 8 Best Things to Do in Lake Tekapo and Mt Cook.
- Dunedin has so much to offer for nature lovers. From the sight of the world's largest birds to the beautiful cliffs of Tunnel Beach, here are the 10 Best Things to Do in Dunedin.
- Not convinced by my words about New Zealand? Come follow me, and I’ll show you New Zealand in 70 photos.
- You can see all my New Zealand travel guides and related articles on my New Zealand Travel Guide page.
3 Comments
Tongariro Crossing - loved it! One of the best things I've done in my life, 'though we didn't make it up to Ngauruhoe :)
Aiming to do this soon, your post is so inspiring! I'm a solo backpacker, can I just book a hostel and a shuttle for the next day and take it from there? Is it easy to meet others wanting to do the same, I'm not an experienced hiker but is a guide necessary, I'm budgeting :) thanks!
Next month I have a plan to go to Tongariro Alpine Crossing but the cost is quite expensive in compare to your budget due to the requirement of having the guide and special equipments. It is $175 included the transportation from Taupo. Hope it could be awesome as your one.