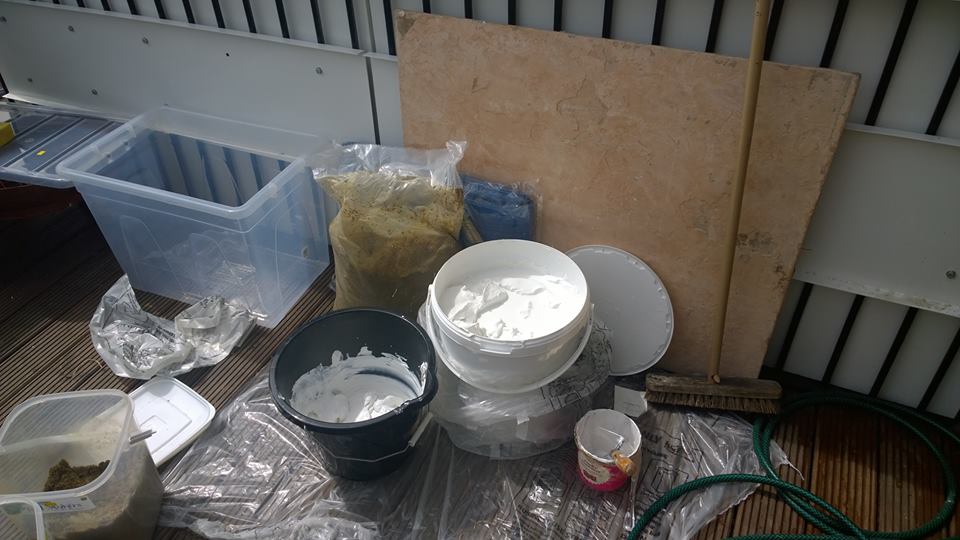
Wall Preparation
First you mix a lime plaster using 2 parts sand, one part lime. Once mixed thoroughly you apply a thick layer to the wall - a layer is called Arriccio - and you leave this to dry. Once this has dried you add another thinner layer of plaster and roughly draw out your design (or Sinopia) so that you have an idea of how the whole thing will fit together. Neither layer should be completely smooth as the final layer needs something to grip onto.
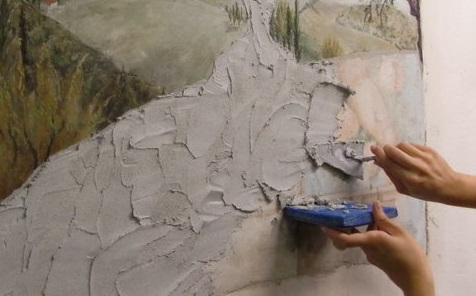
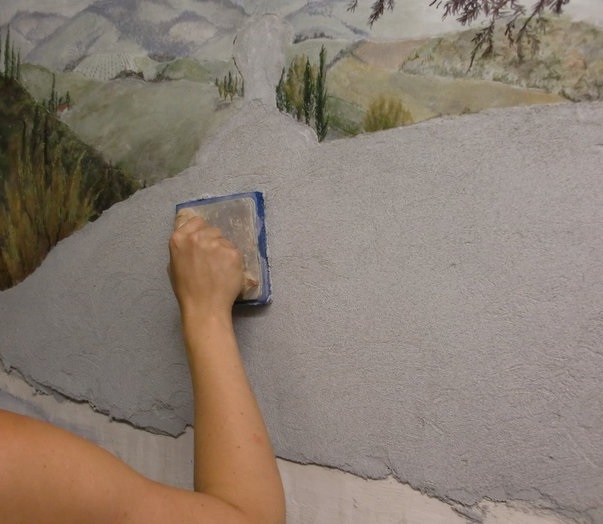
On the first day of painting you wet the wall throughly with a sponge and add a final layer of plaster, the intonaco, but only over the area you intend to paint on that day. The plaster needs to be thrown onto the wall, smoothed down with a board until there are no bumps, air bubbles or dents. You then use the bottom of the trowel to make the surface glassy smooth. When you can touch the surface and your fingertips no longer have any white lime on them you can start work. You hold the cartoon, a detailed sketch of the final design, against the wall. There are two ways of transferring the design to the plaster. Either you will have pricked tiny holes along the drawing and will use a bag filled with red pigment (a Spolvero) to lightly tap against the cartoon. This will form a line of red dots on the plaster which you join together. The other technique is where you lightly press over the lines of the cartoon making a dent in the plaster. This can be seen in the plaster afterwards so is less desireable.


Painting
You now have eight hours to paint this section of your fresco. The first layer of paint is applied as a wash with a large brush and you then build up the strength of colours and details as the plaster dries. It is important to wait in between paint layers for the pigment to sink into the plaster or you risk washing the colour away. If this happens you will have to scrape everything off and start again the next day. The drier the wall gets the more detail you can add, until you are left with the last 'golden' hour in which to complete the fine details. After this the plaster will not absorb any more paint.
When painting fresco the technique I was taught was used in the Renaissance period. The background washes used for skin is green (as shown in the picture above), for grass and plants black and the sky would be painted red with a layer of Lapis Lazuli added once the plaster was dry. Unlike other earth pigments blue does not always mix with the chemicals in the lime.
Once you have finished and the plaster is dry you scrape off the parts you have not completed, making sure to leave a sloping edge. The next day you will soak the section of wall you wish to work on, as well as the plaster you painted the previous day, with a sponge or water spray. You will then make sure that the new plaster reaches the same height as the previous days work so that you do not see join between the two.
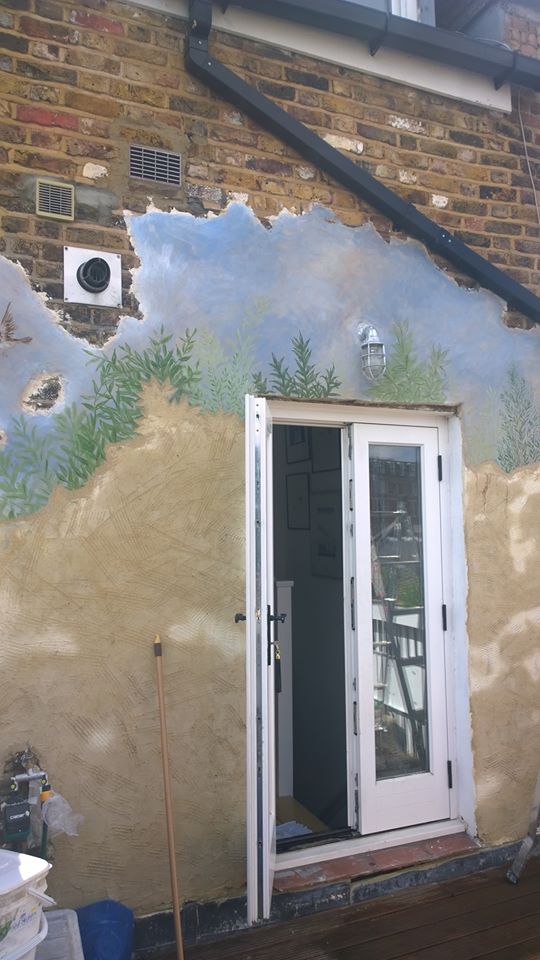
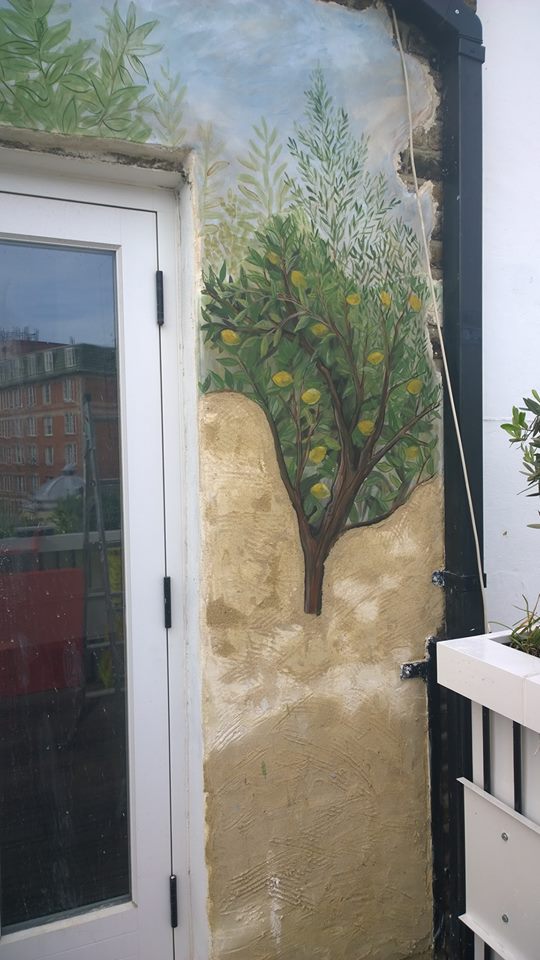
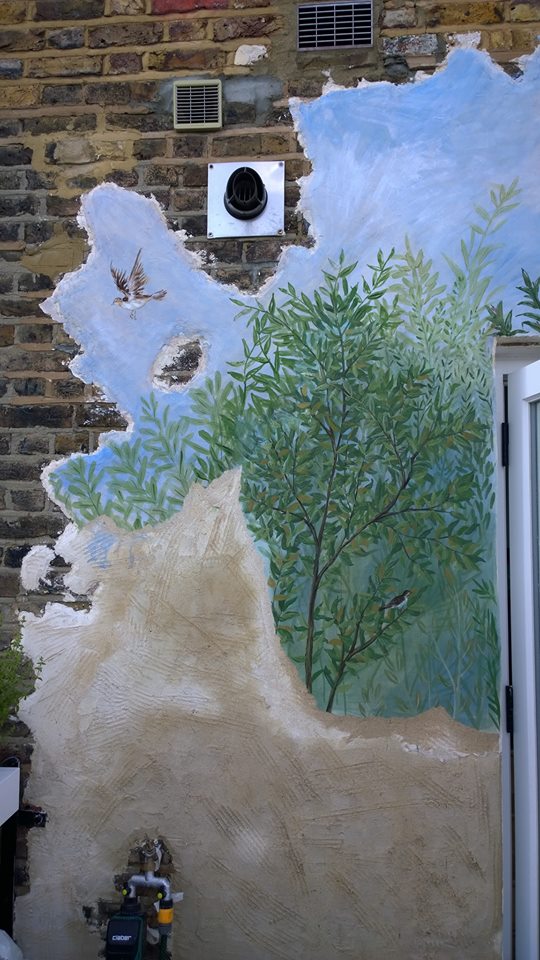
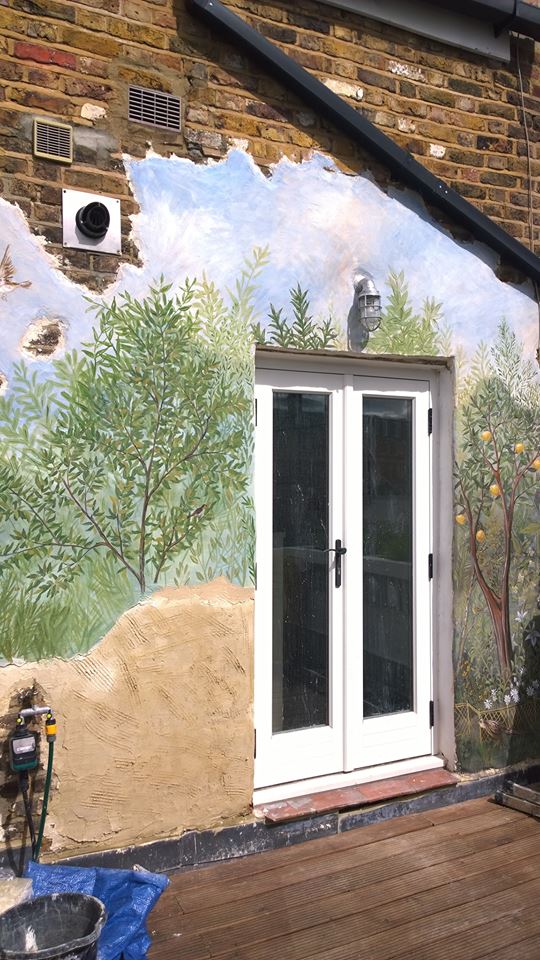
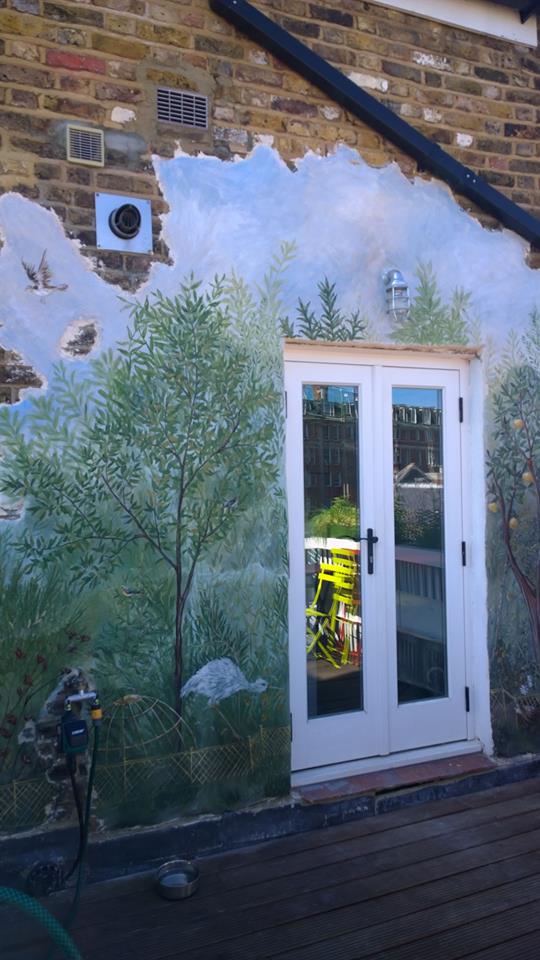
Below are some pictures to show the development of one of my frescos so that you can see how it might be done.